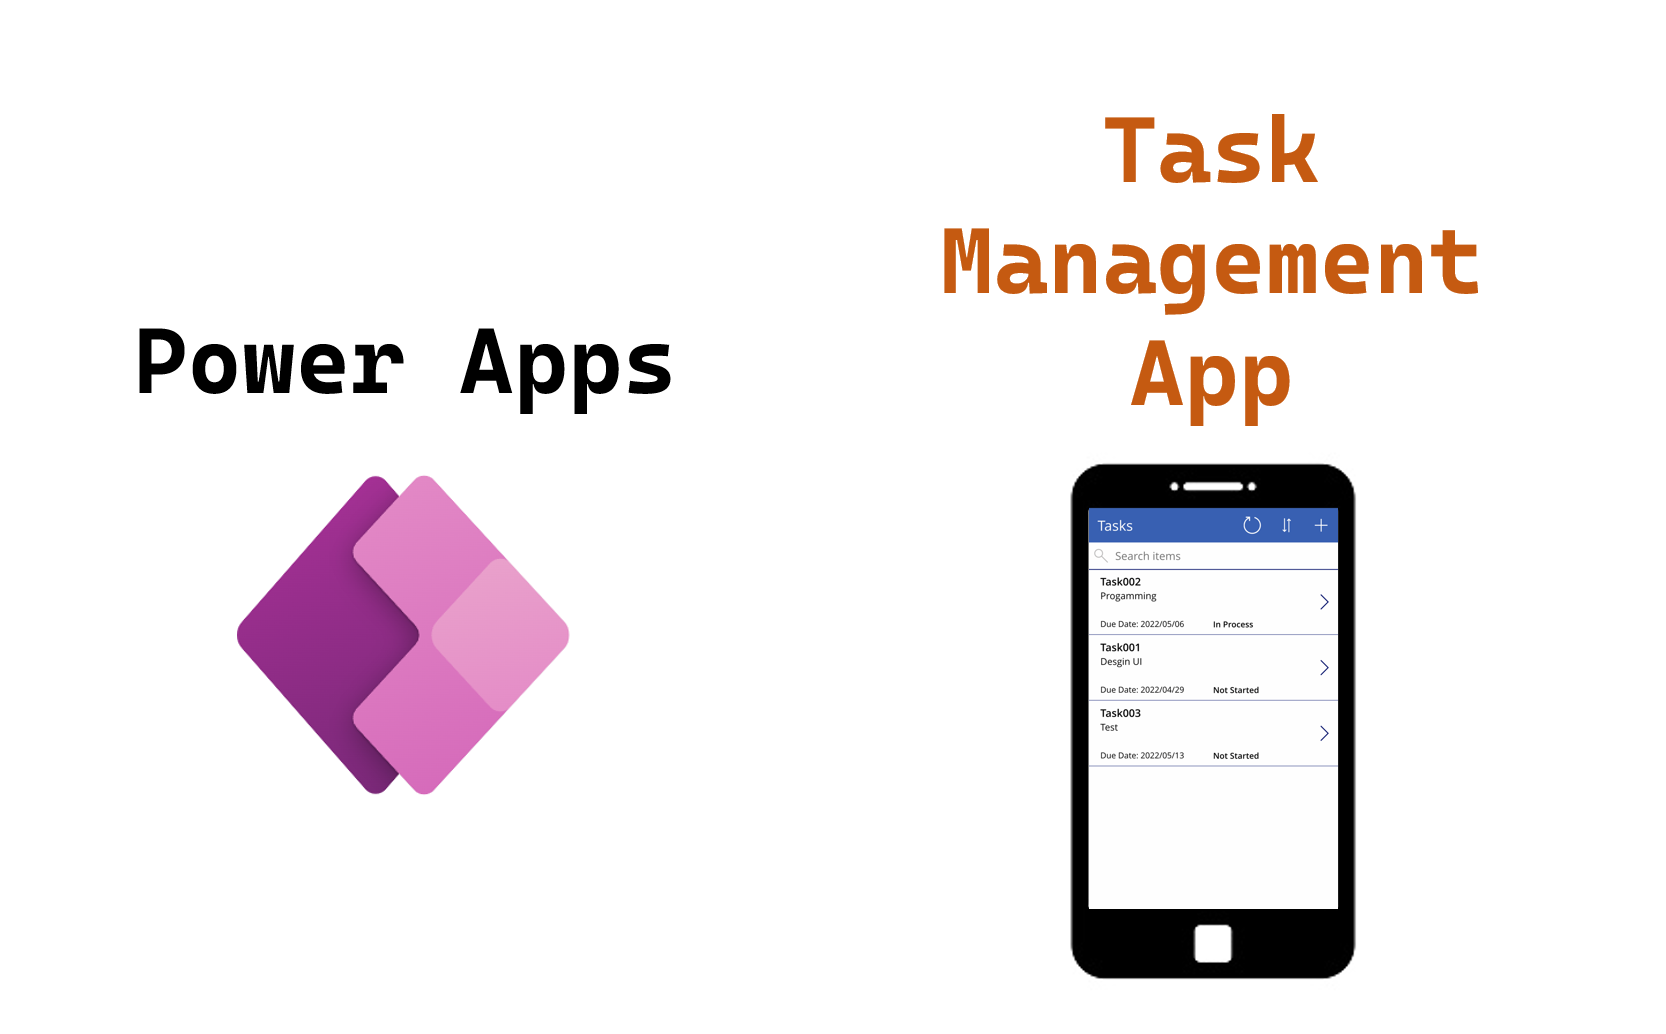
PowerApps >> Create a Task Management App in 10 Minutes
Table of Contents
In this article, let’s create a task management app using Power Apps.
Prepare data
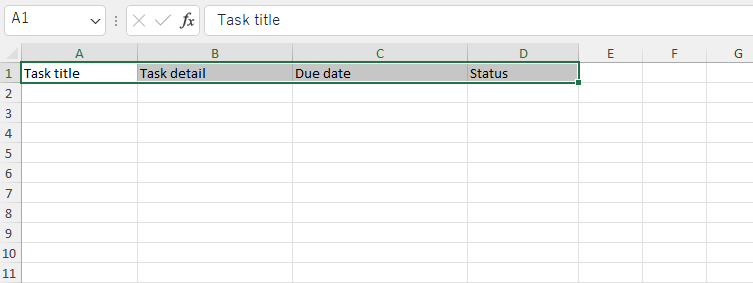
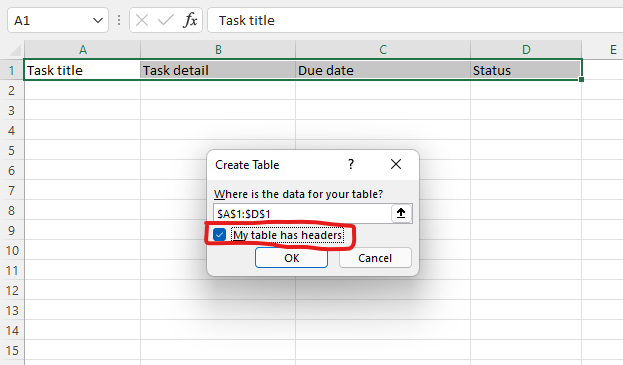
Firstly, we need to create an Excel with the below format.
| Task title | Task detail | Due date | Status |
|---|
We should set the format of the “Due date” column to Short Date type.
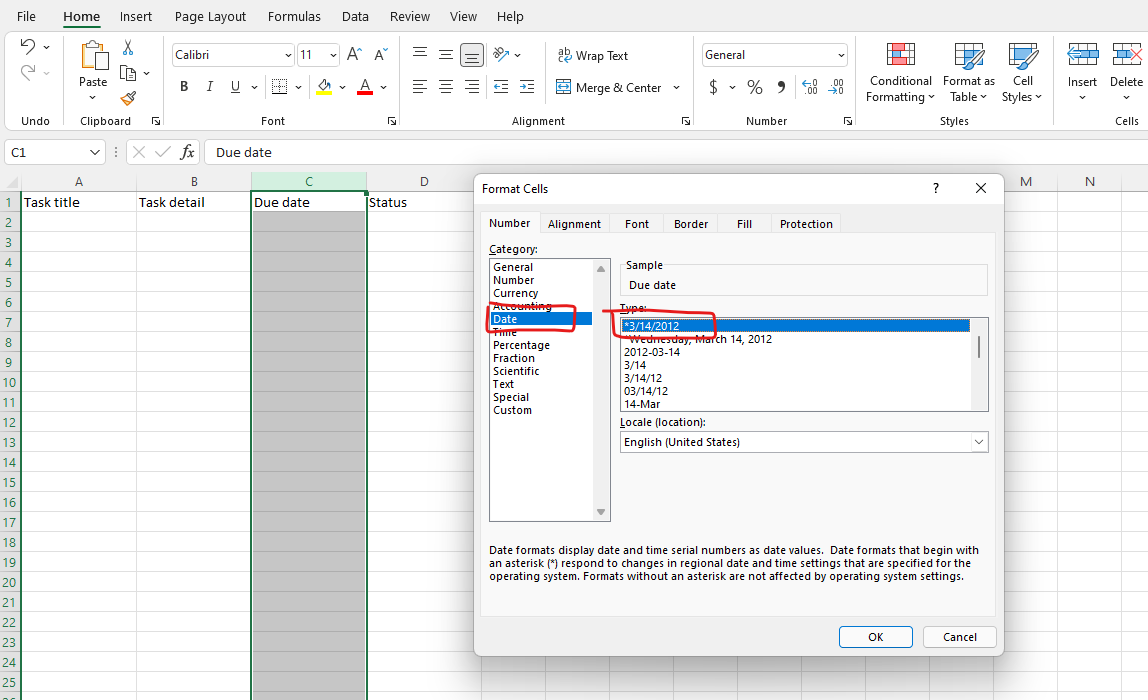
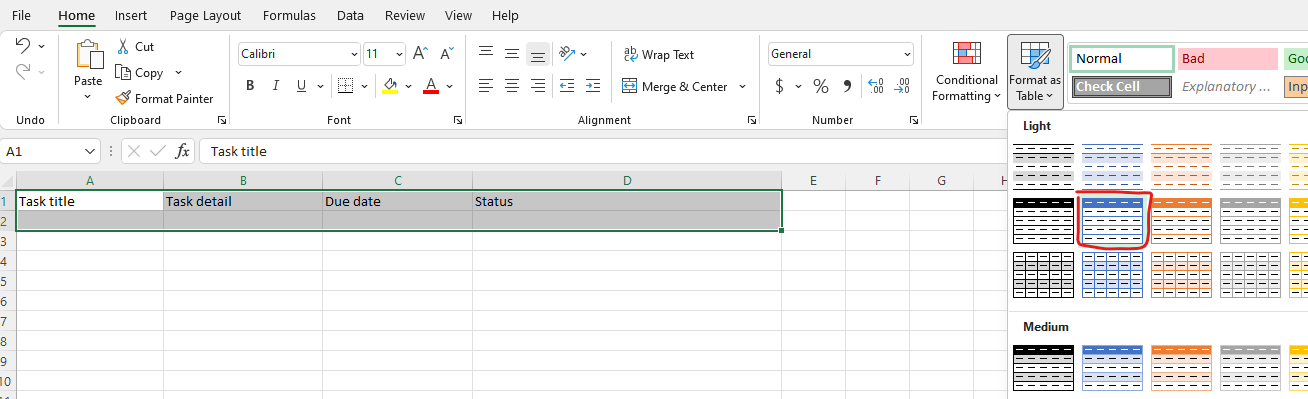
Select all the columns of the first two rows and click “Format as Table” menu. When dialog shows up, “My table has headers” should be checked.
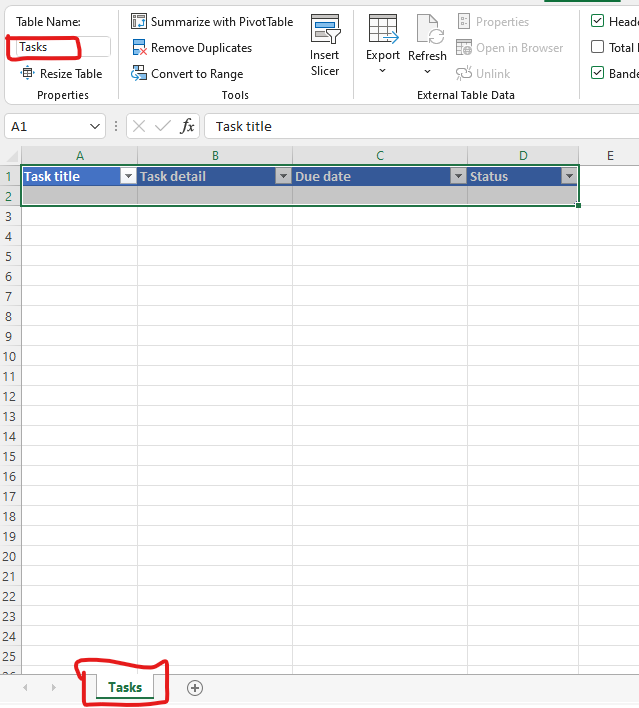
Then change the Table Name and Sheet name to Tasks.
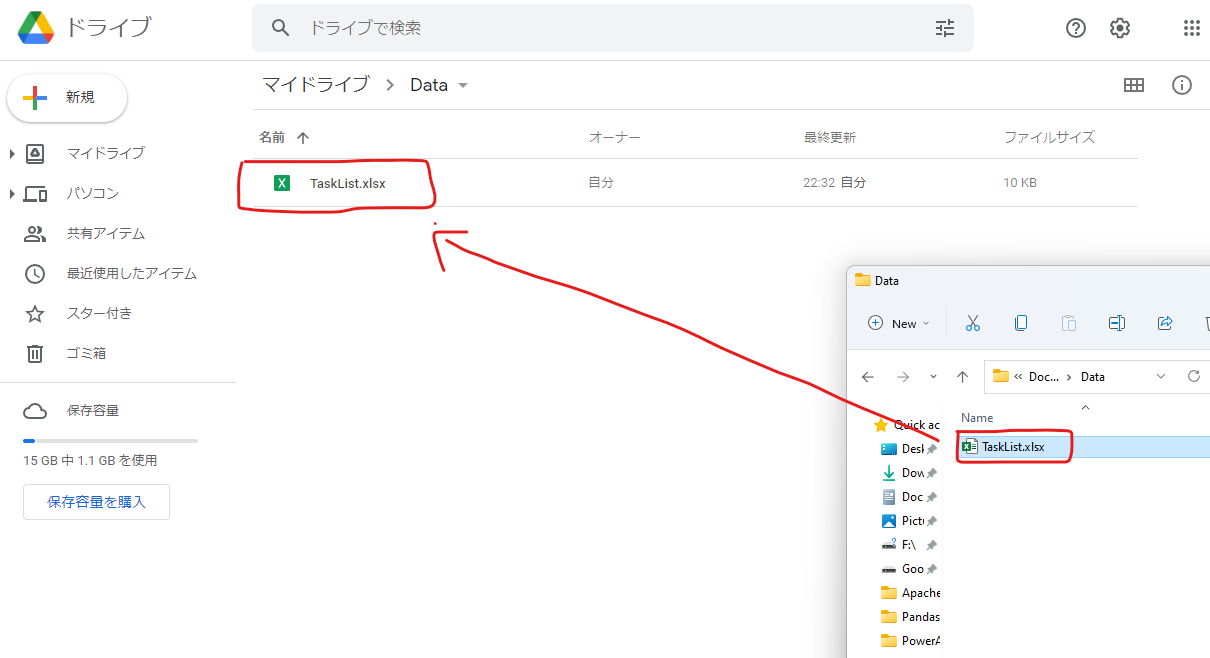
Save the Excel file as TaskList.xlsx and upload it to Google Drive.
Create an app from Excel
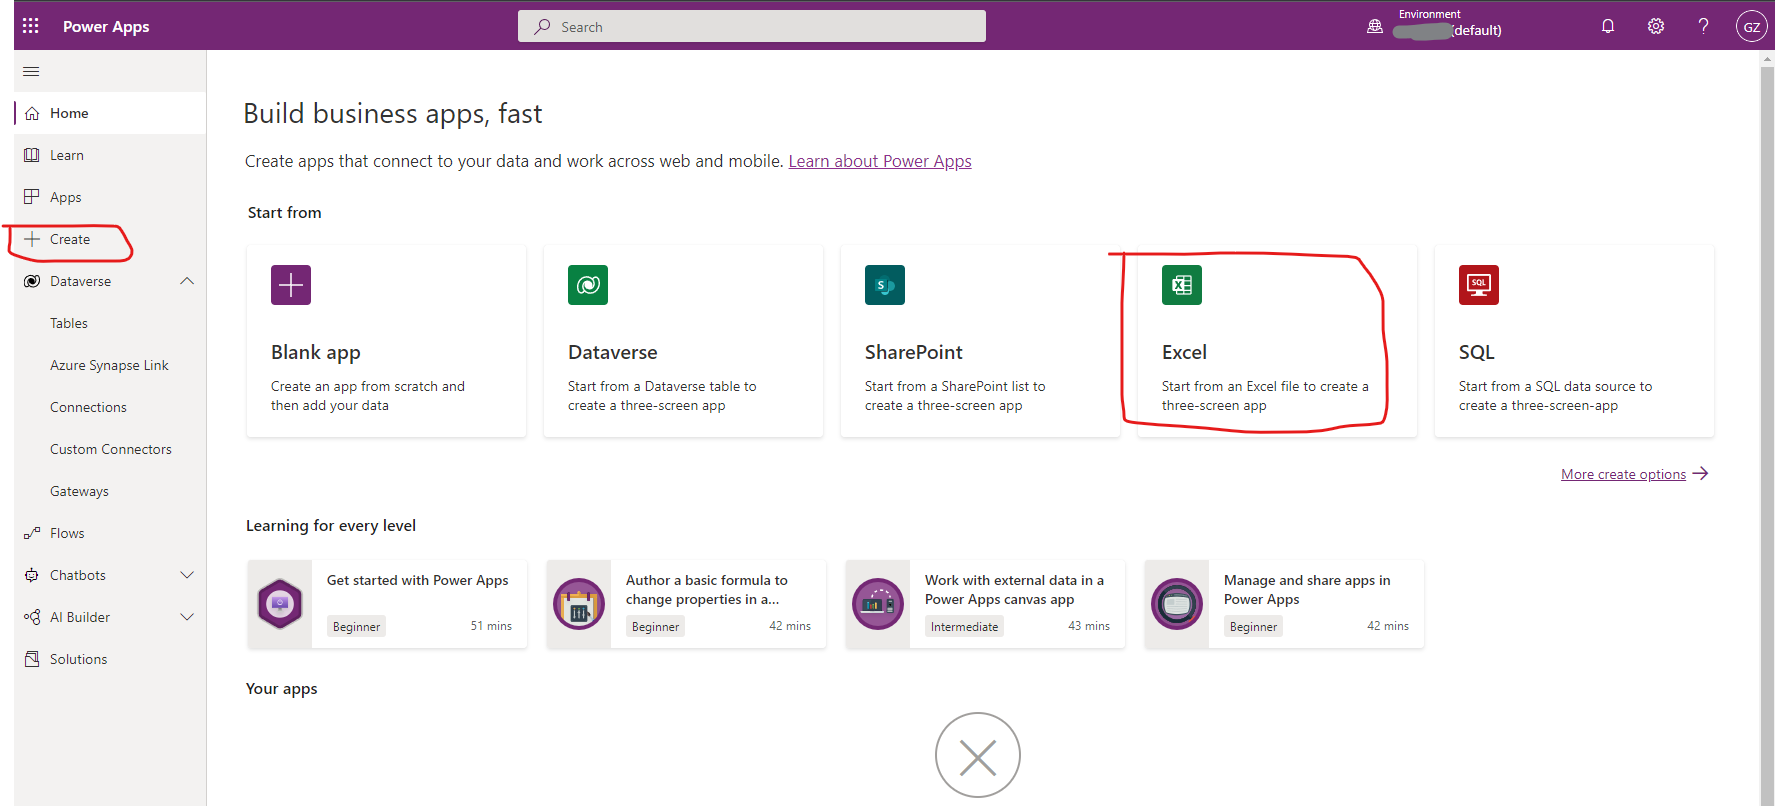
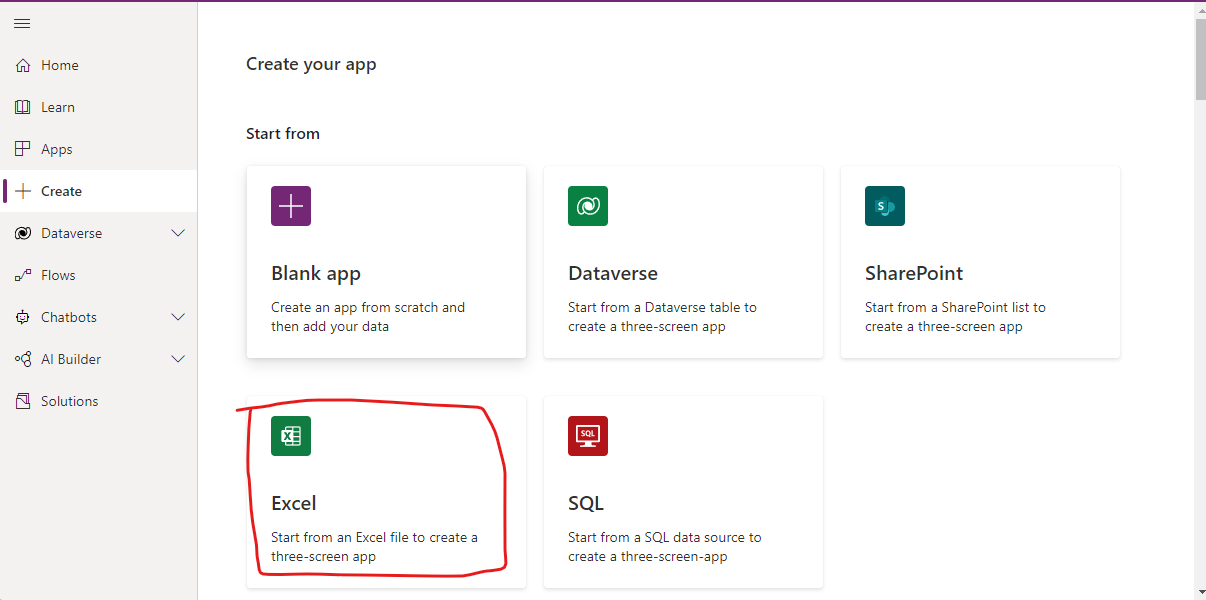
Next, Sign into Power Apps and click Create button and select Excel type.
If you don’t have a Power Apps account, you can reference the below article to register a 30-days free account.
PowerApps » Register A Free Account for Using Power Apps
https://thats-it-code.com/azure/powerapps__register-an-account-for-using-power-apps/
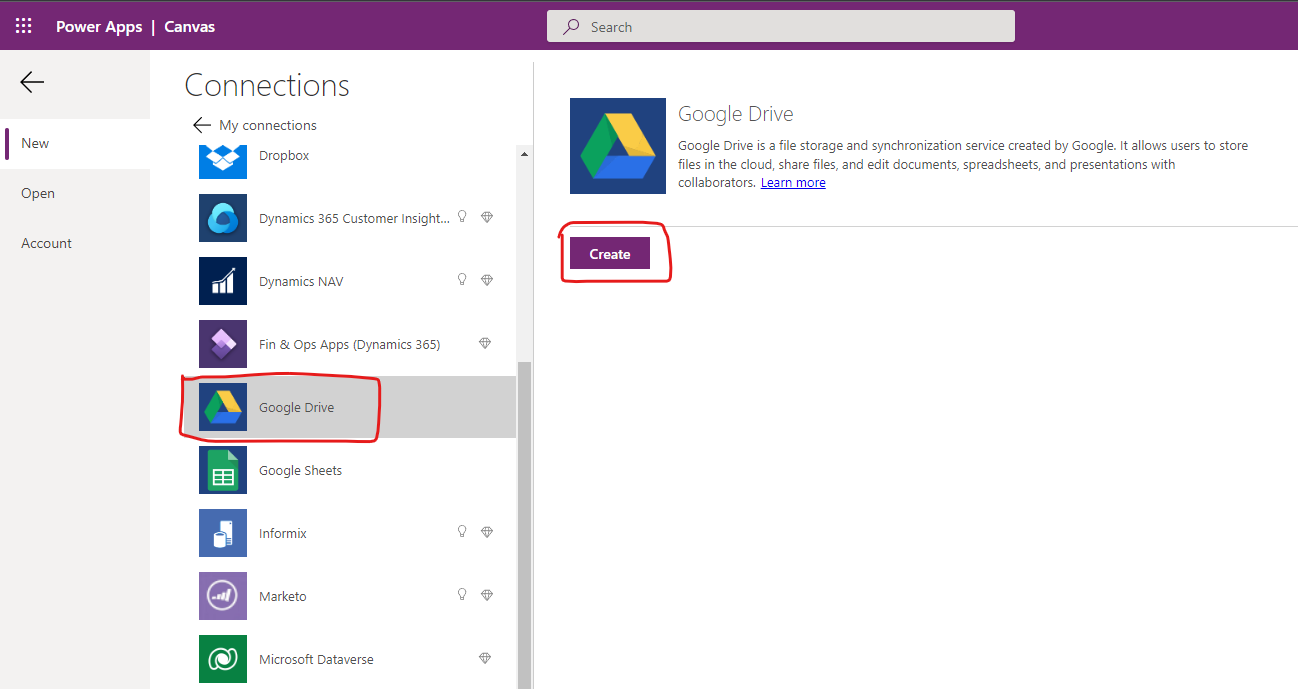
Select Google Drive in the connection selection page and click create button. Log into the Google account and grant the permissons.
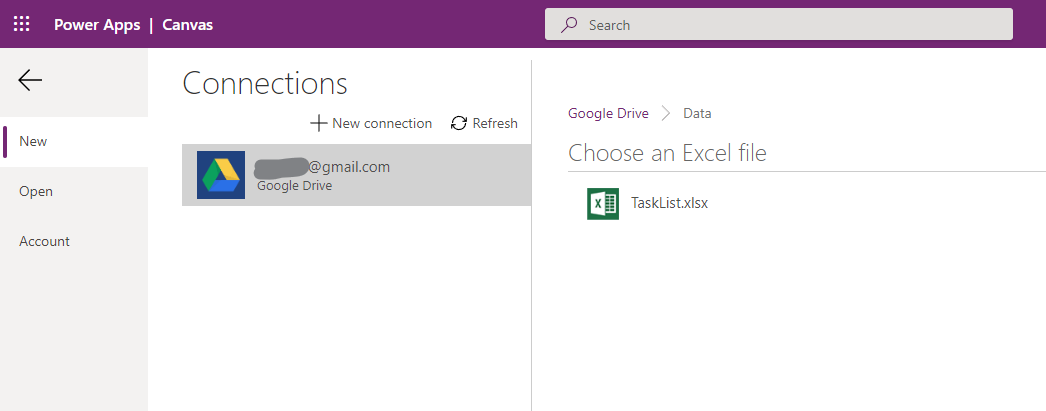
Select the uploaded file on the above.
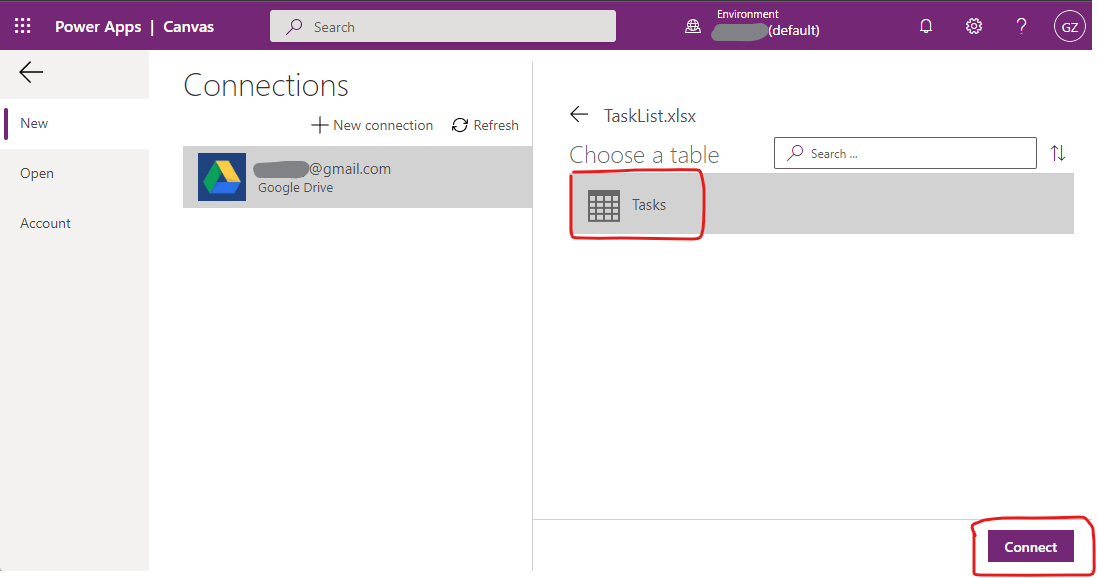
Choose the detected table (Tasks) and click Connect button.
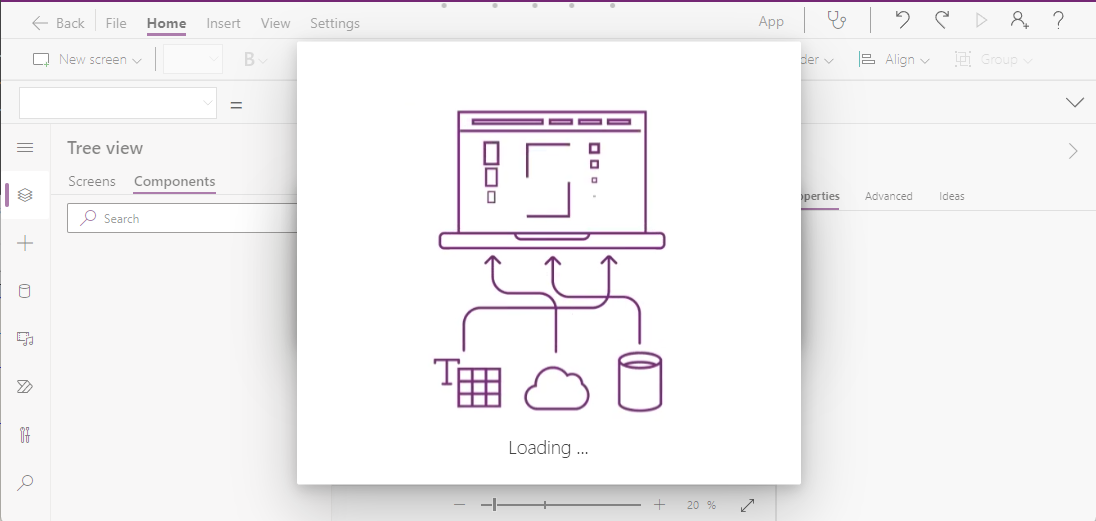
The automatic app creation will begin.
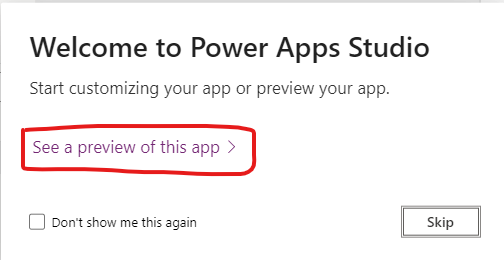
When finished, a dialog will show up and click “See a preview of this app”.
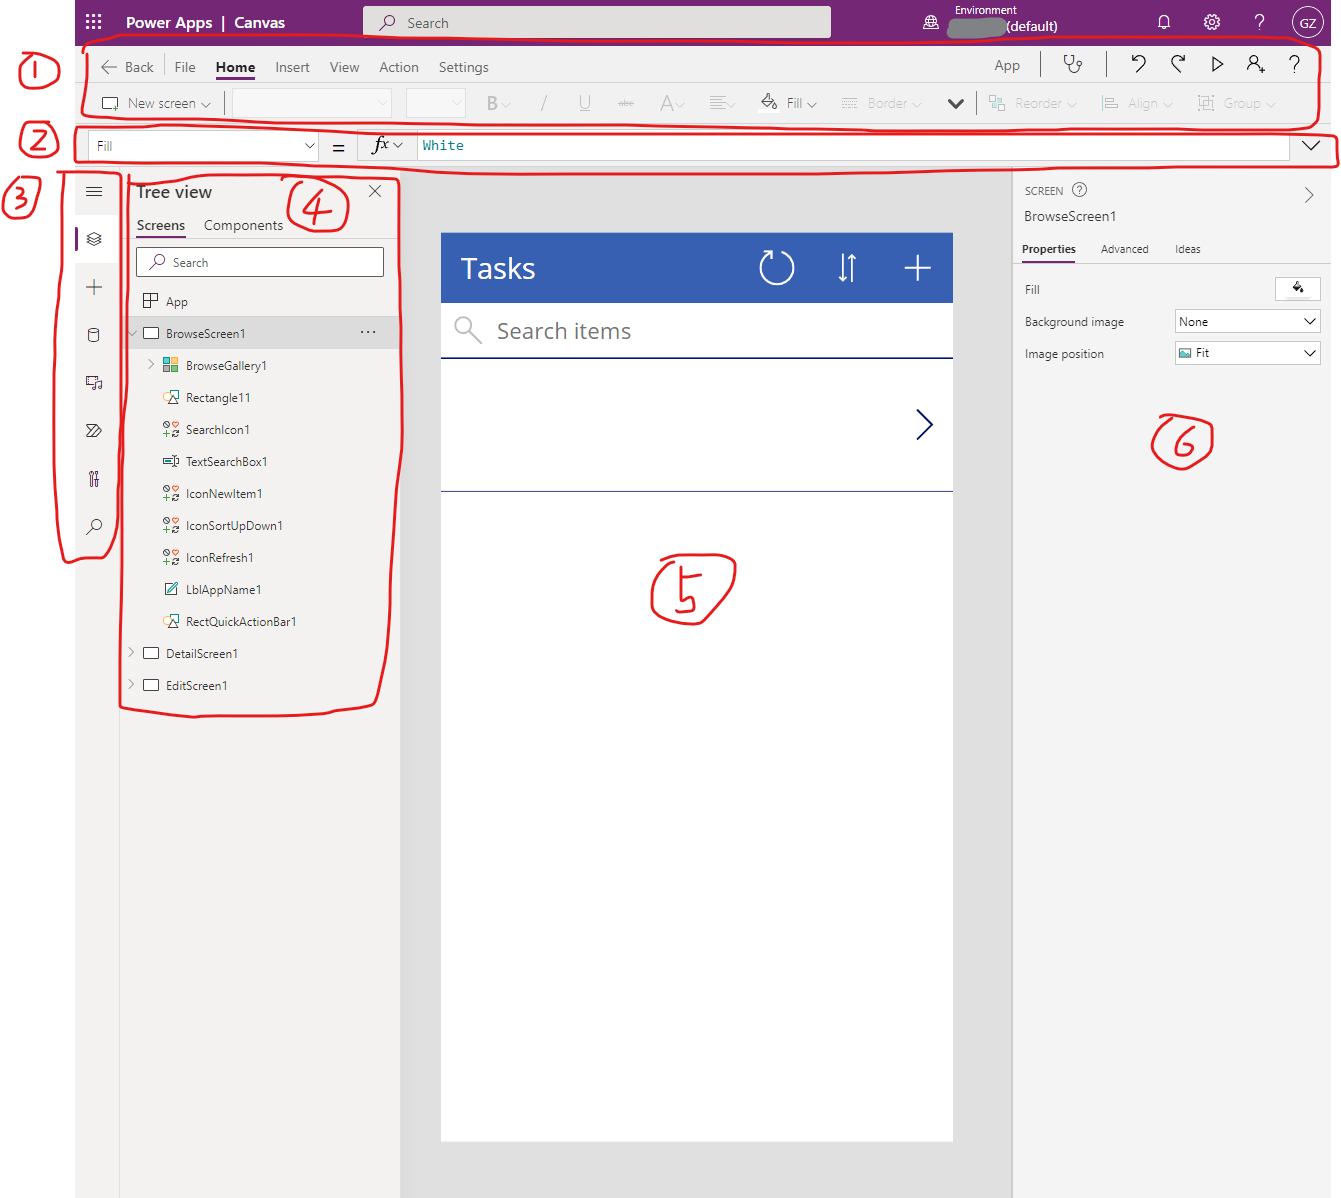
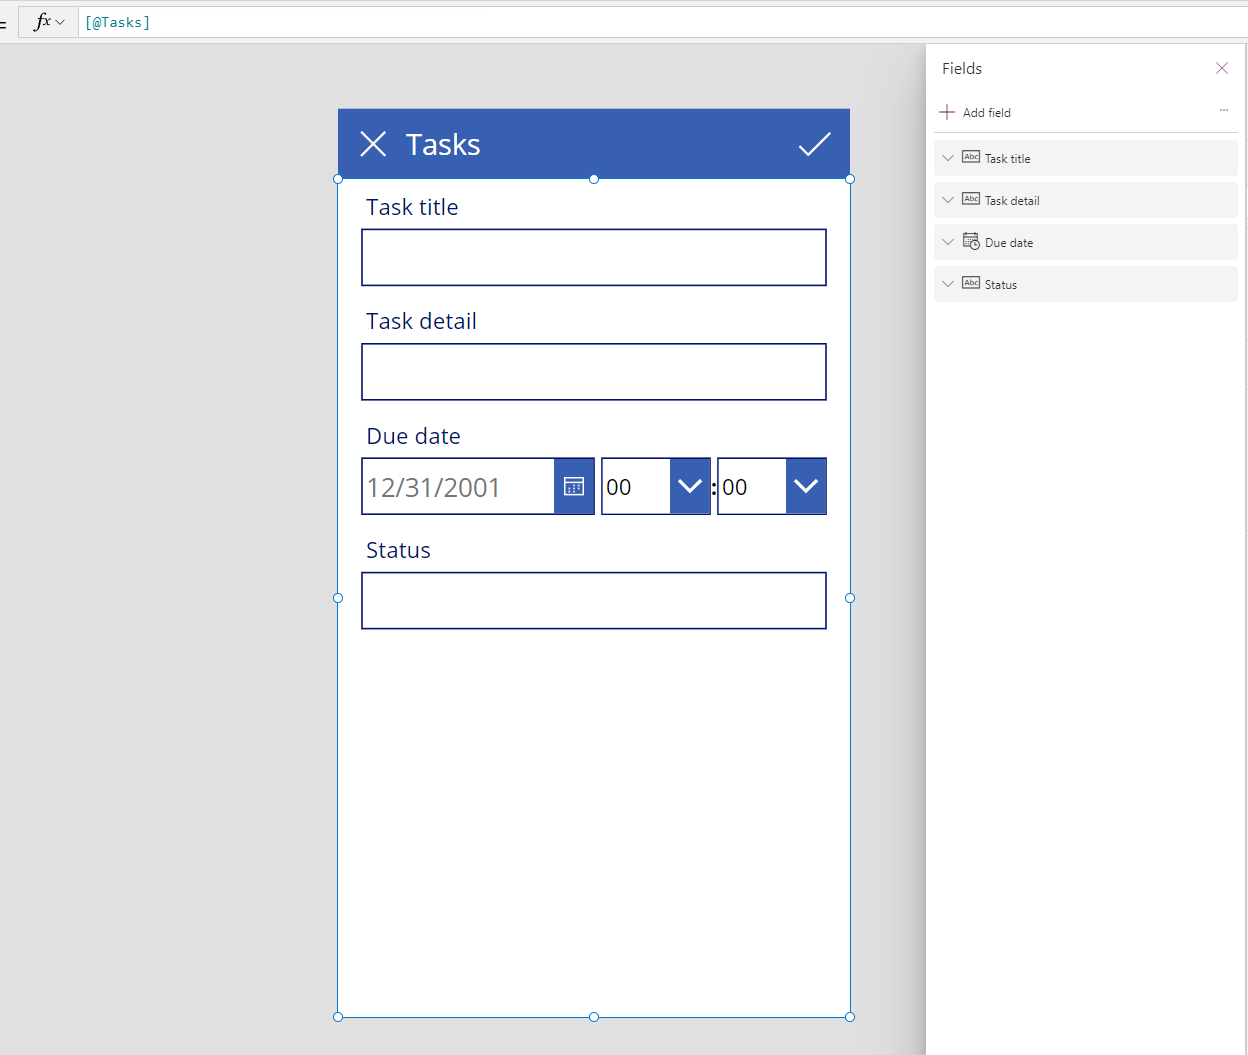
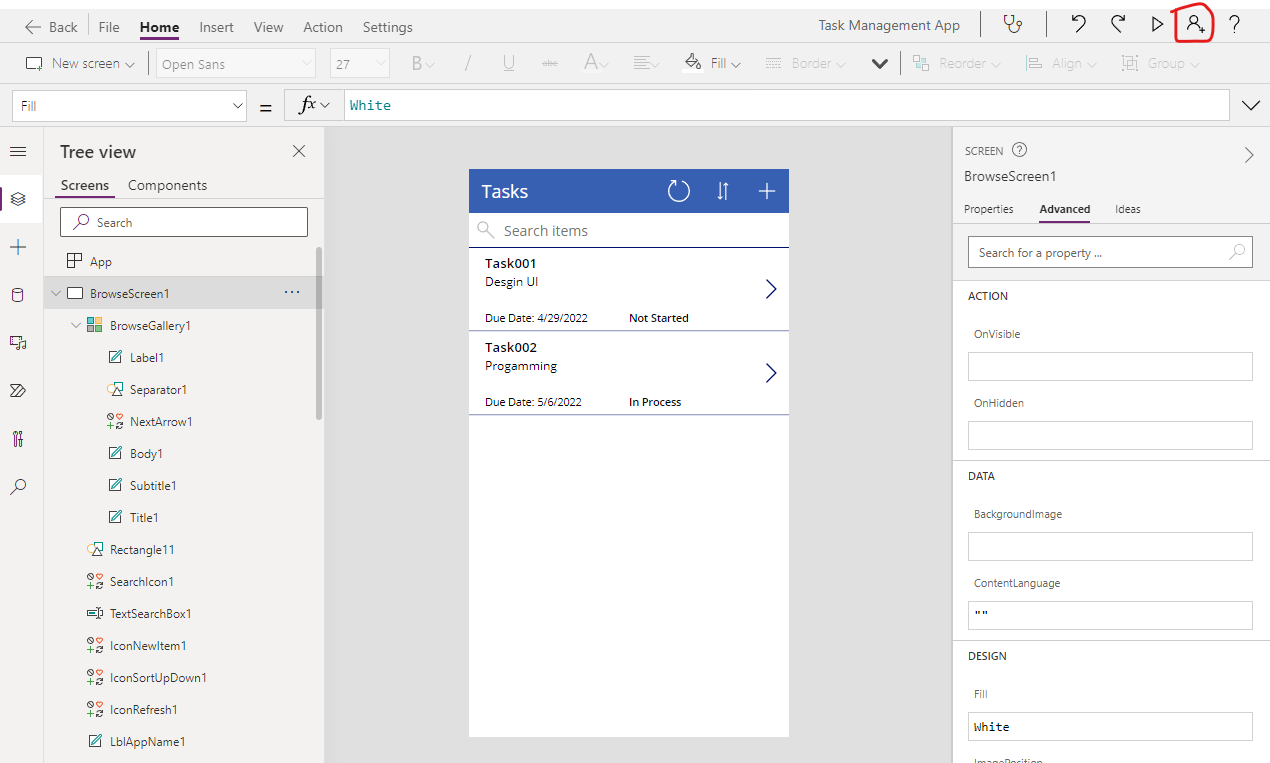
The app edit page will show.
(1) Main menu
(2) Formula edit bar
(3) Tools sidebar
(4) Tree view of screen components
(5) Screen Preview
(6) Property setting
Customize the app
There are some unnatural aspects in the automatically generated screens.
We will make adjustments to these aspects.
Firstly, let’s open the edit screen.
Change field order
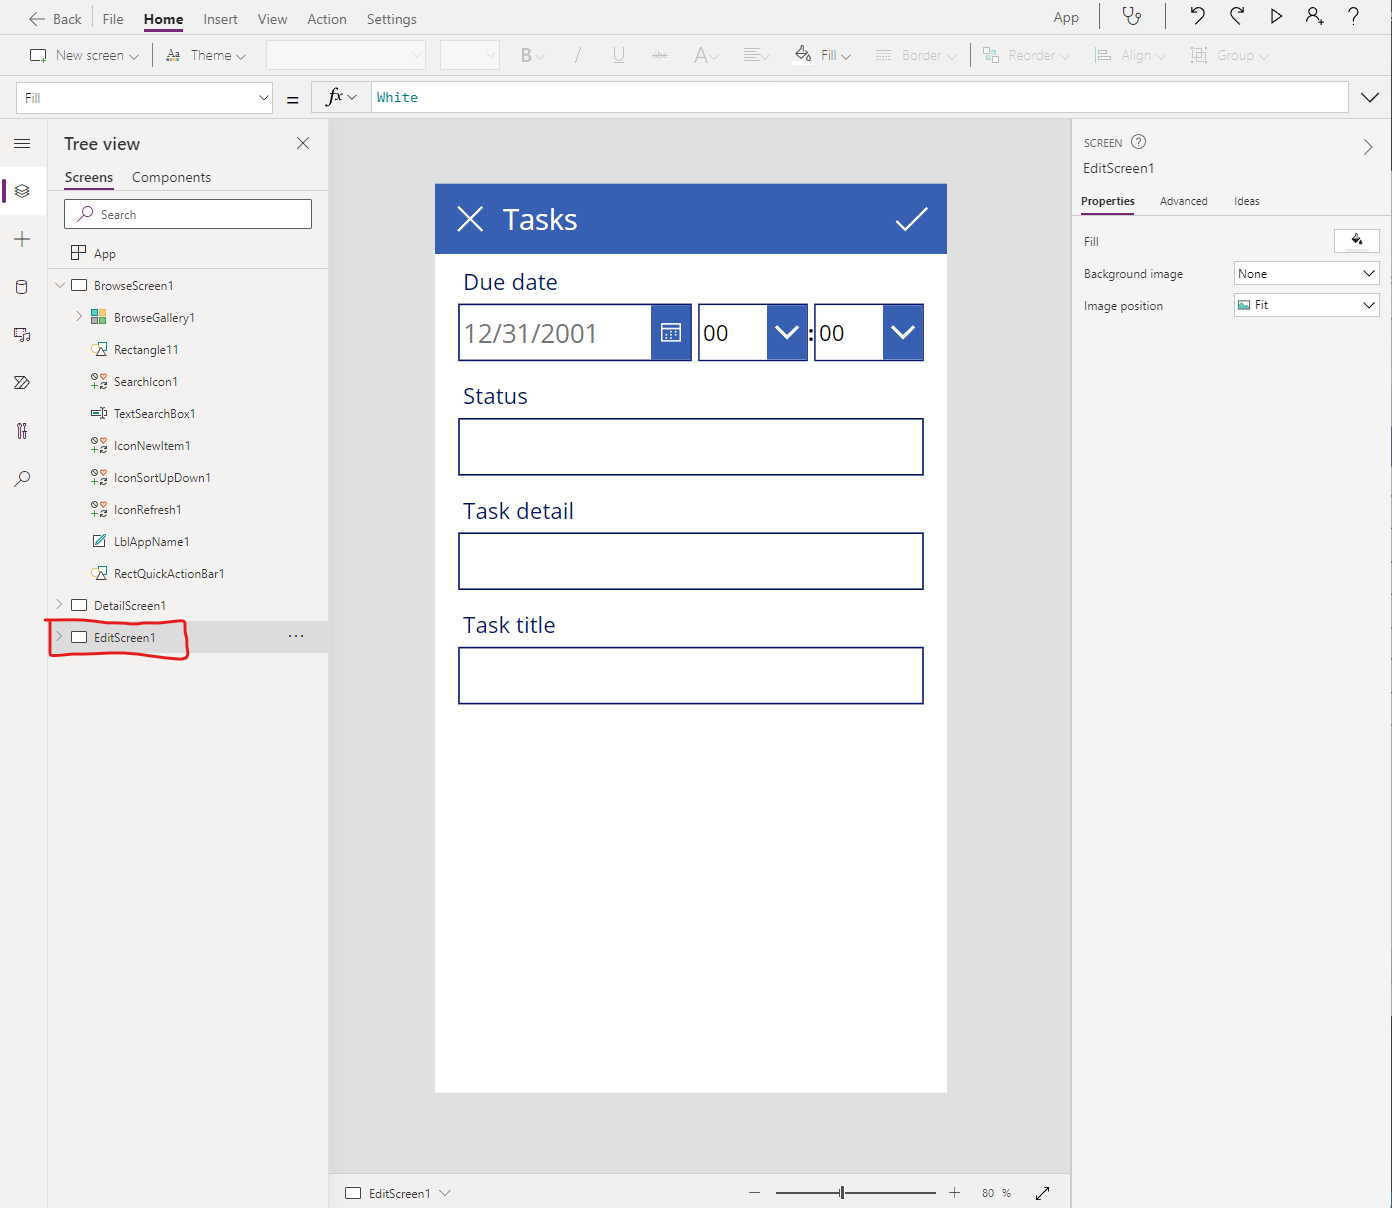
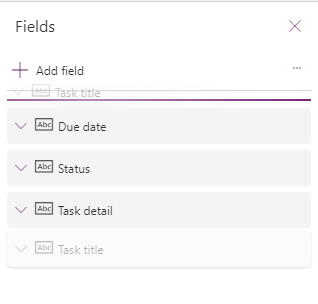
As you can see, the “Due date” is displayed at the top of the fields list. This order is unnatural. Let’s change the order of fields.
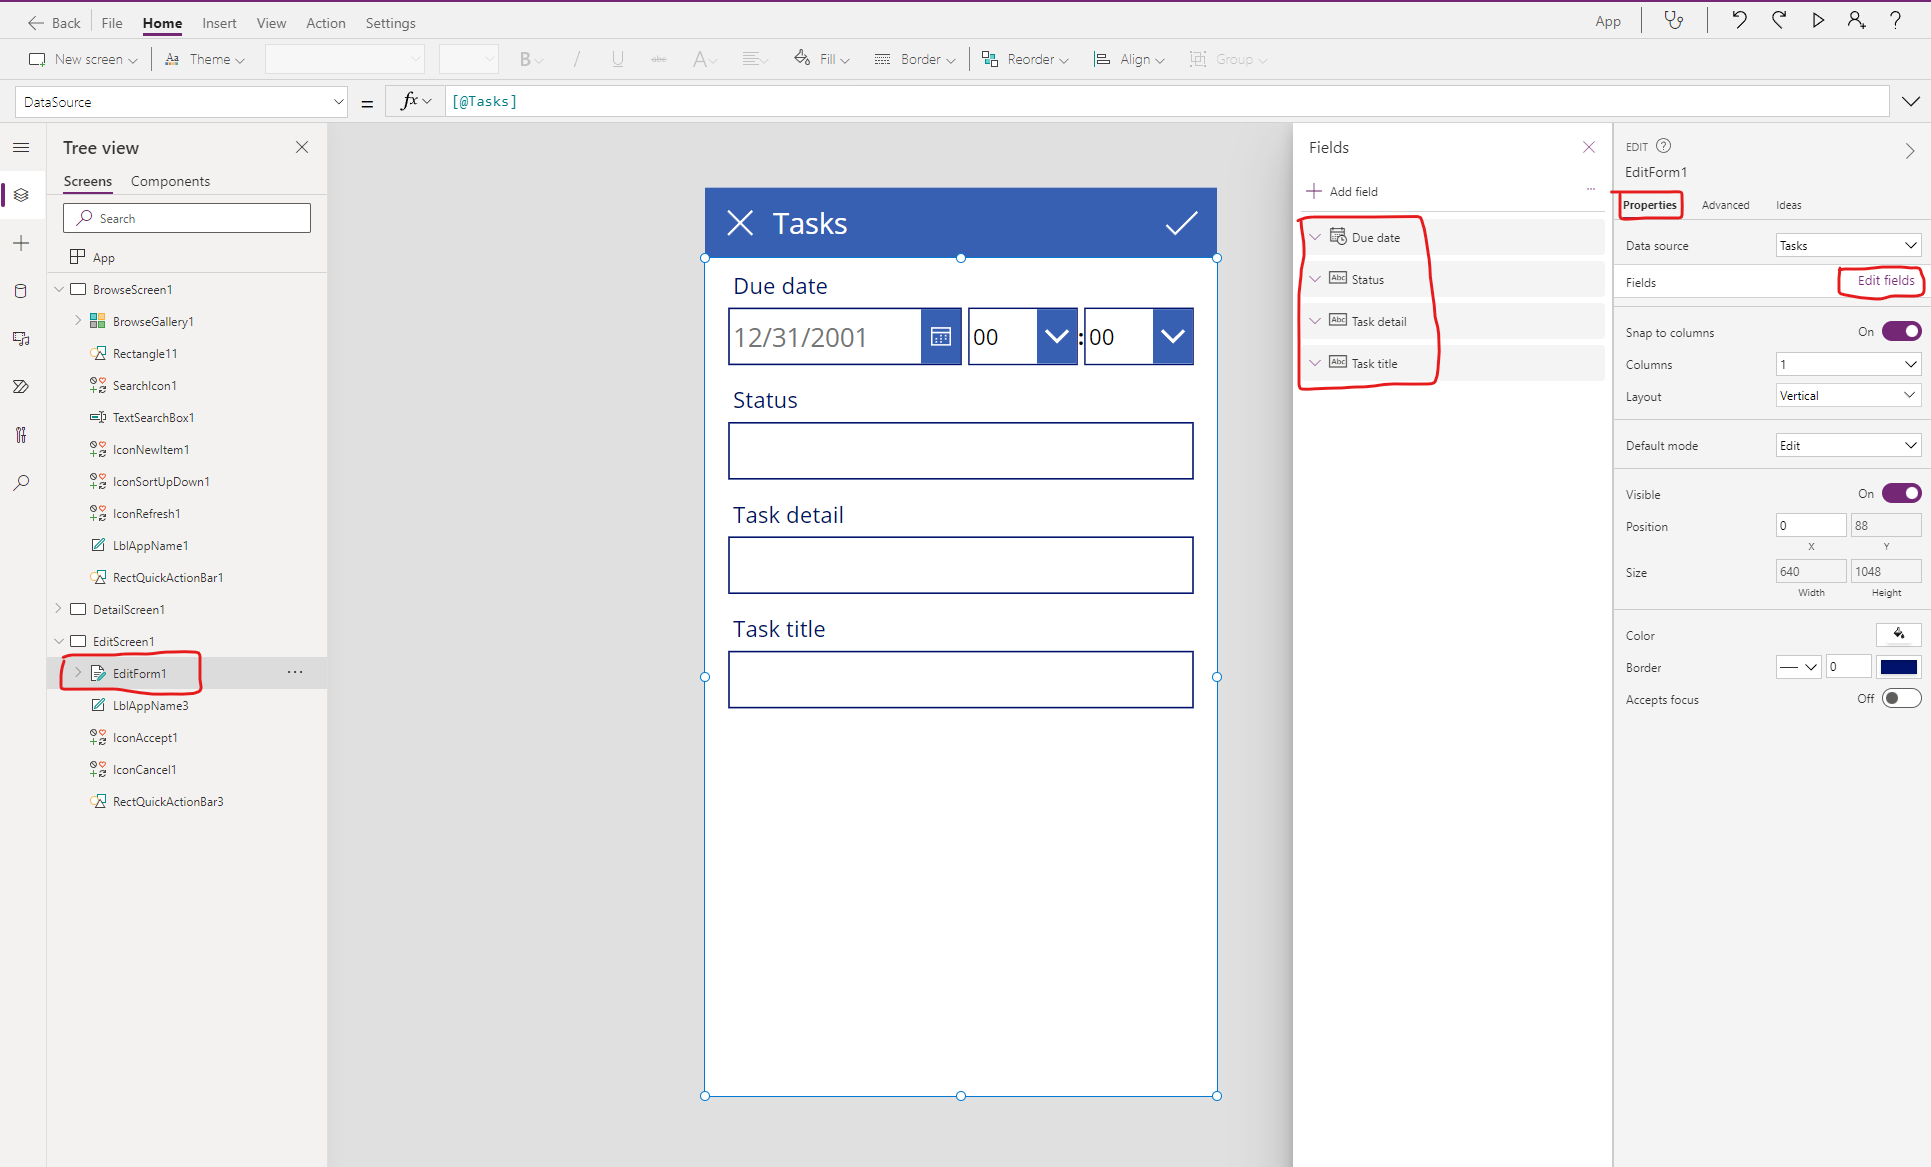
Select “EditForm1” in the Tree view, click “Edit fields” in the Properties tab. Fields list will show up.
We can change the order of the fields by drag-and-drop operation.
The final order is as follows.
- Task title
- Task detail
- Due date
- Status
Save the app
To prevent the loss of the app in production, it is best to save it in time
We’d better save the app in time to prevent unexpected loss.
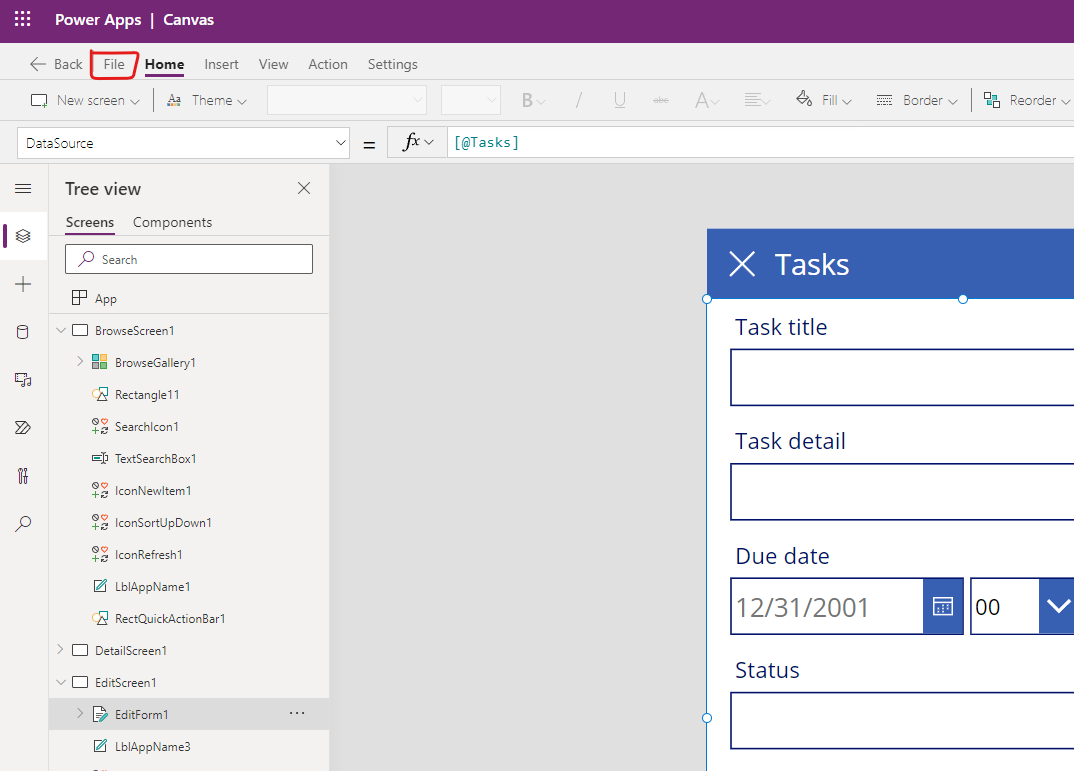
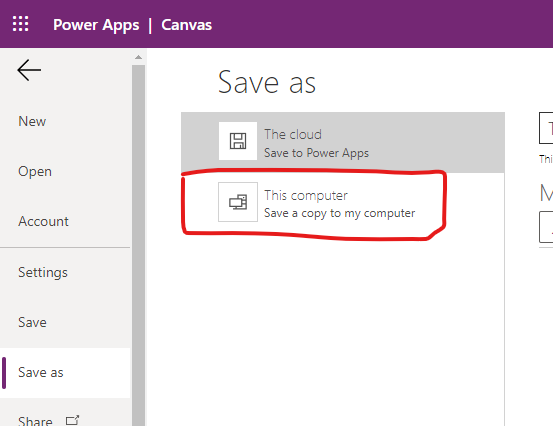
Click the “File” in the top menu, click “Save as”.
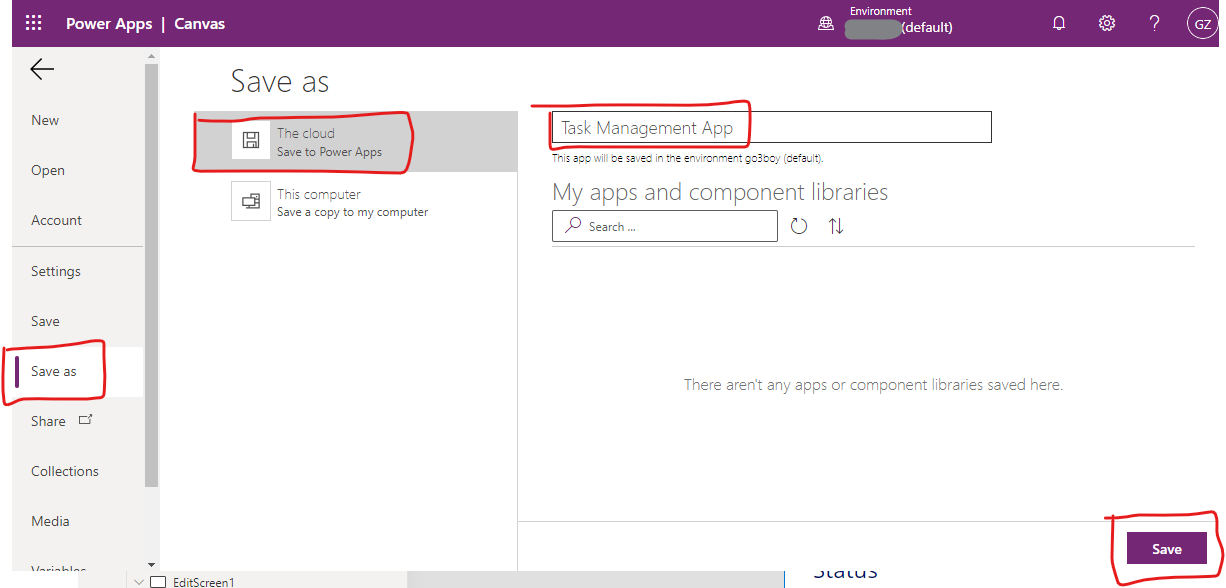
There are two options to save the app. The cloud and This computer.
If you select “The cloud” option, you need to provide a name for the app and click Save button.
If you select This computer option, the file for download is prepared. Click “Download” button and save the file to local folder.

Re-open the app
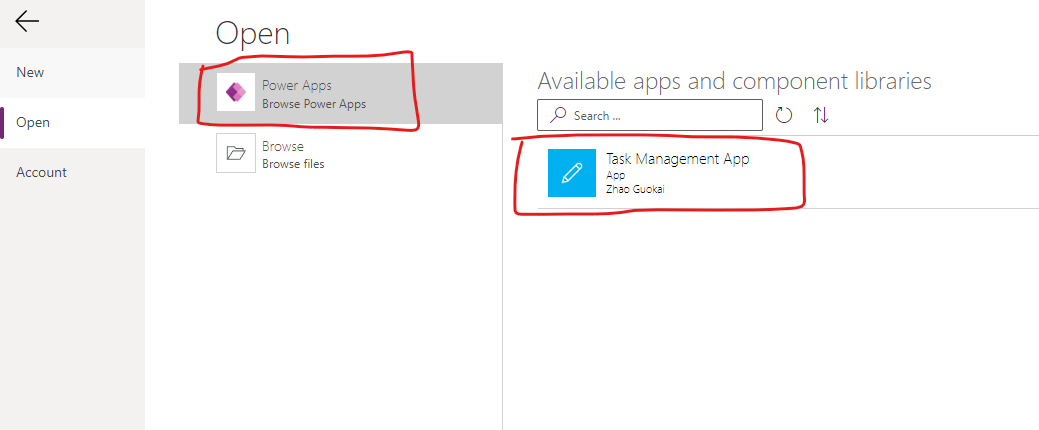
If we want to reopen the app editing, we can click Create button, select Excel, click Open, select Power Apps and select the saved app last time from the Available apps list.
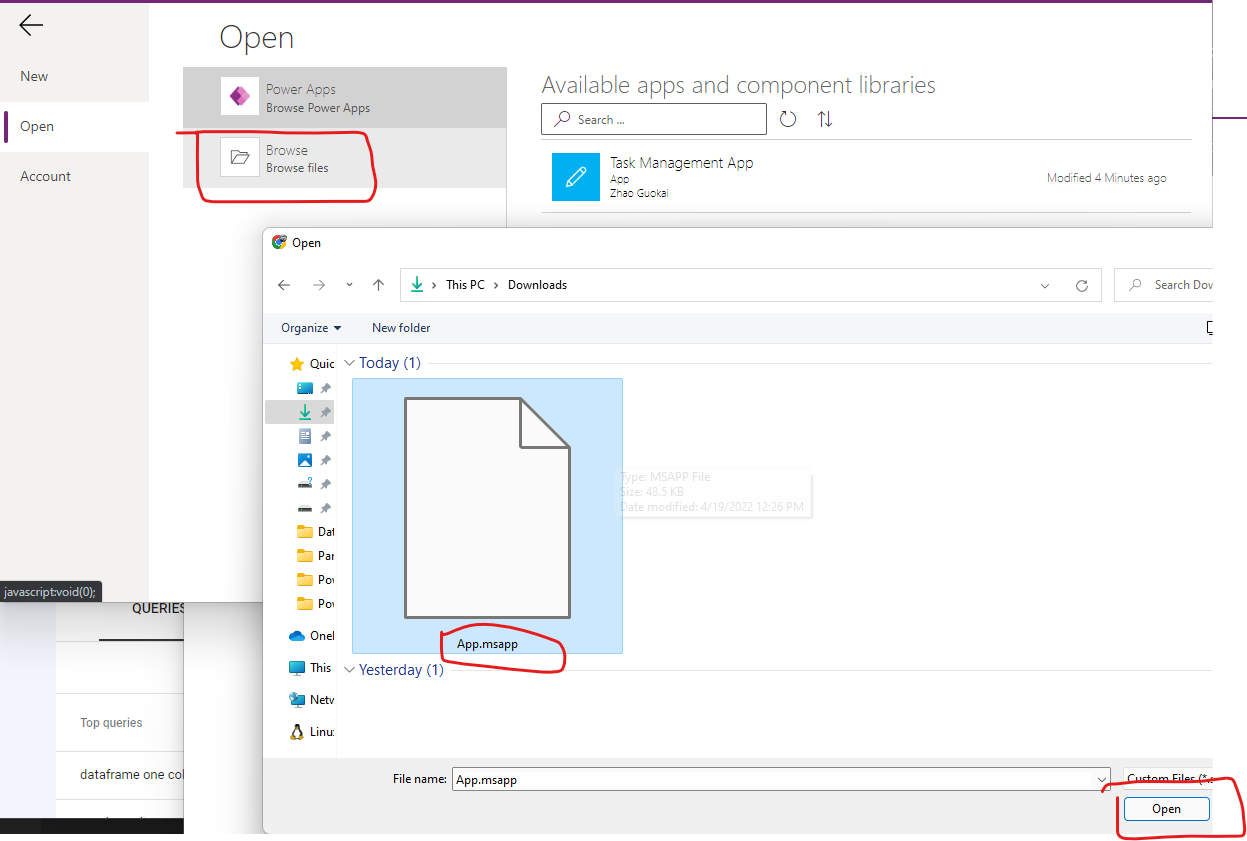
Or click Browse and select the saved file in the local folder.
Delete hour and minute
Next, let’s continue to customize our app.
The hour and minute are not needed in the Due date field, so we should delete them.

To edit the field, we need to unlock it first.
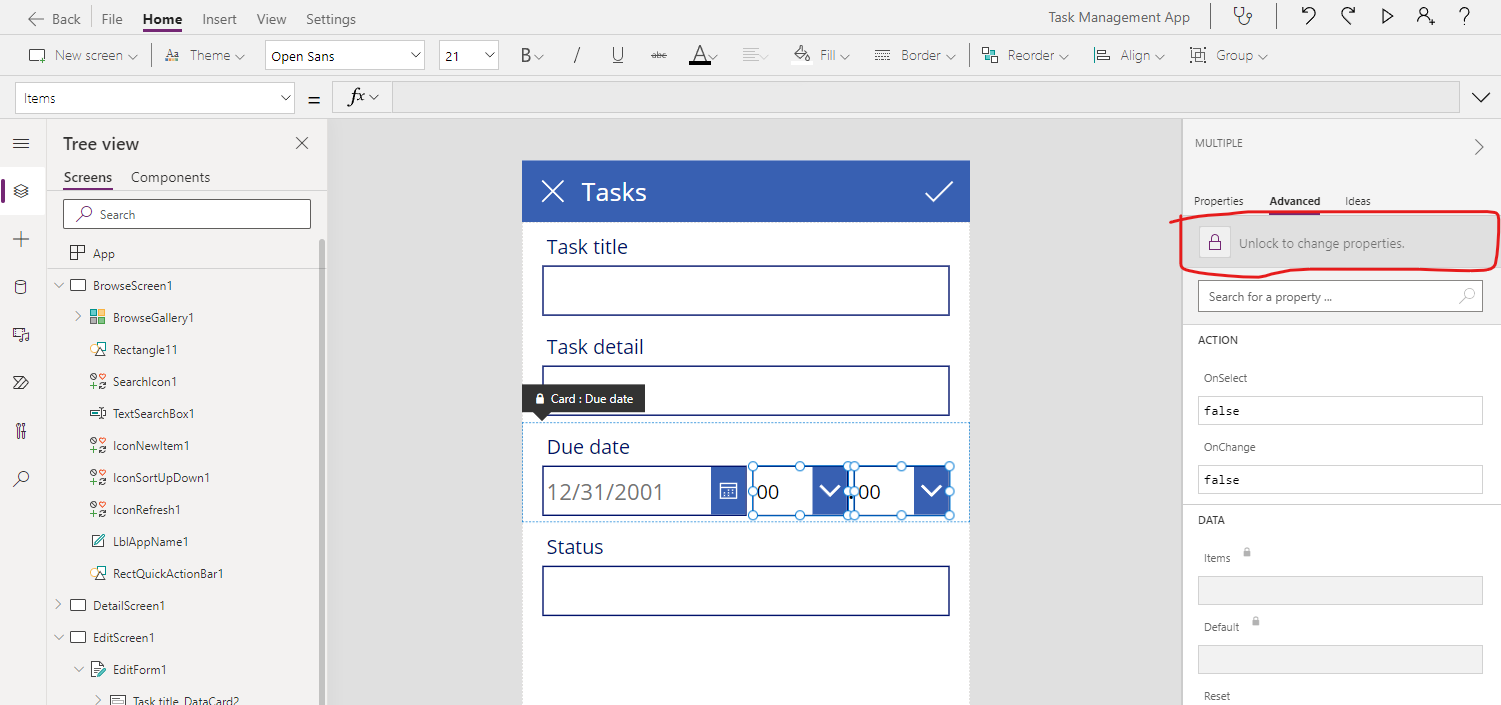
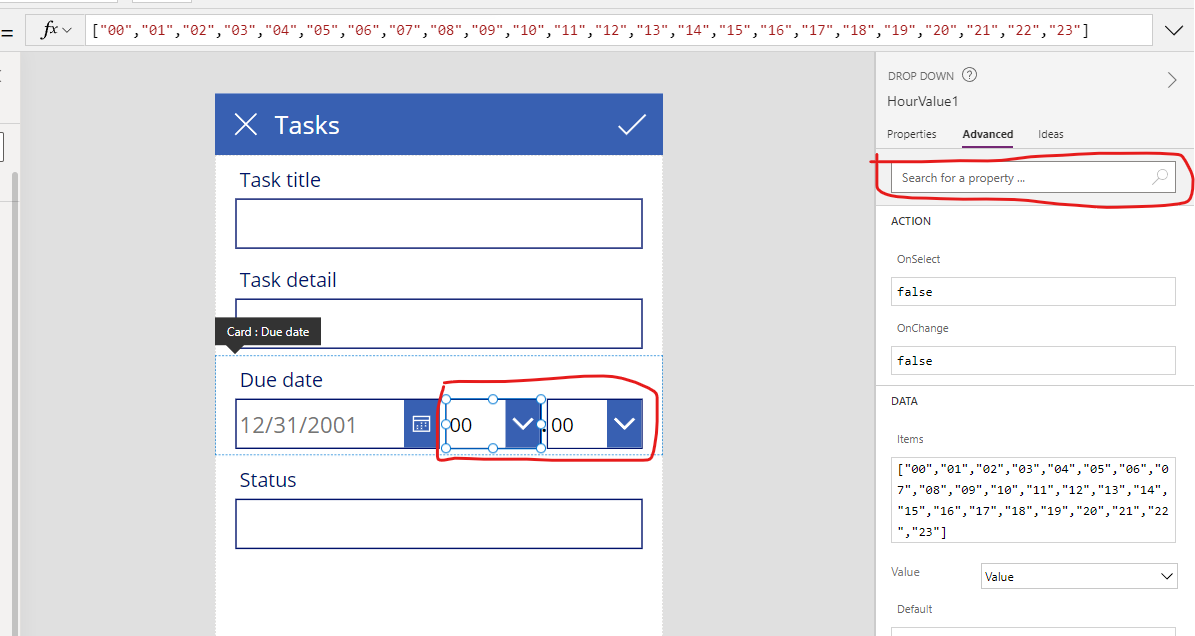
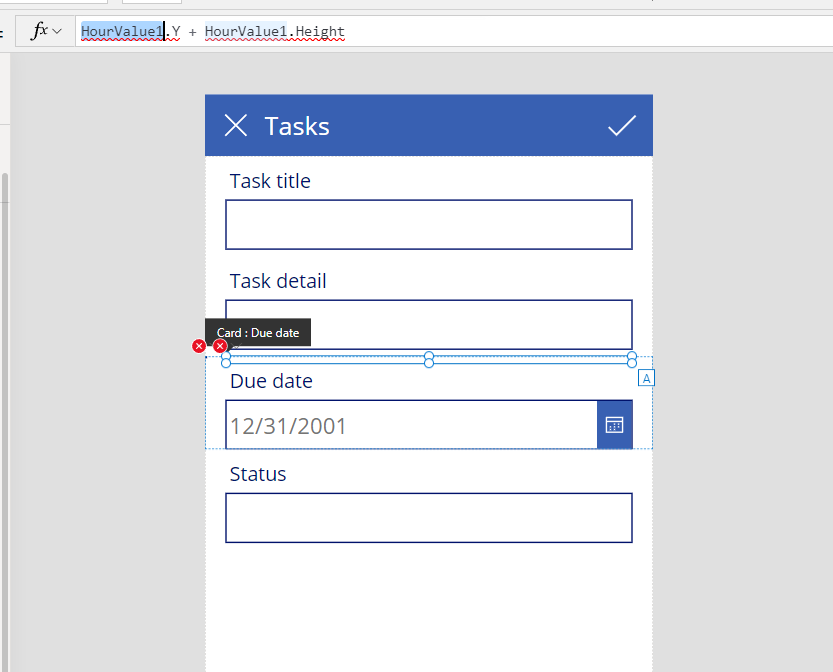
And delete the hour, minute and the seperator.

Expand the date field and align it with the above fields.
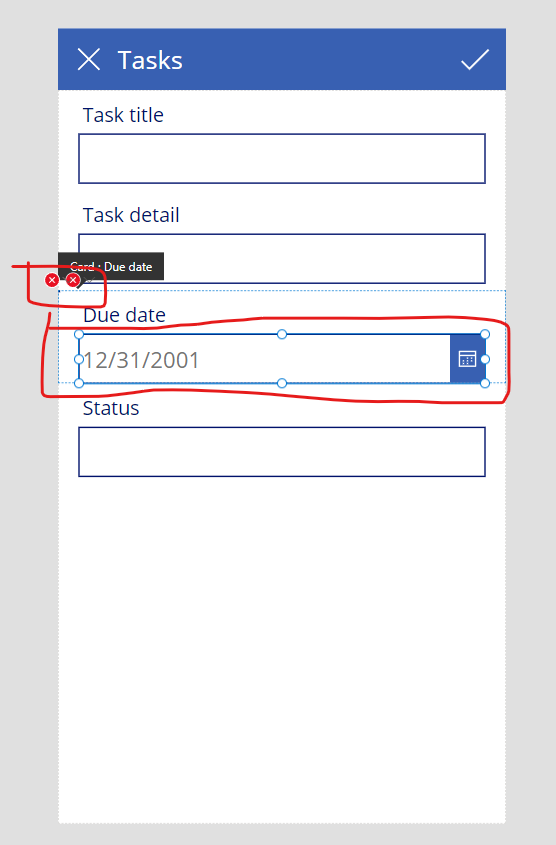
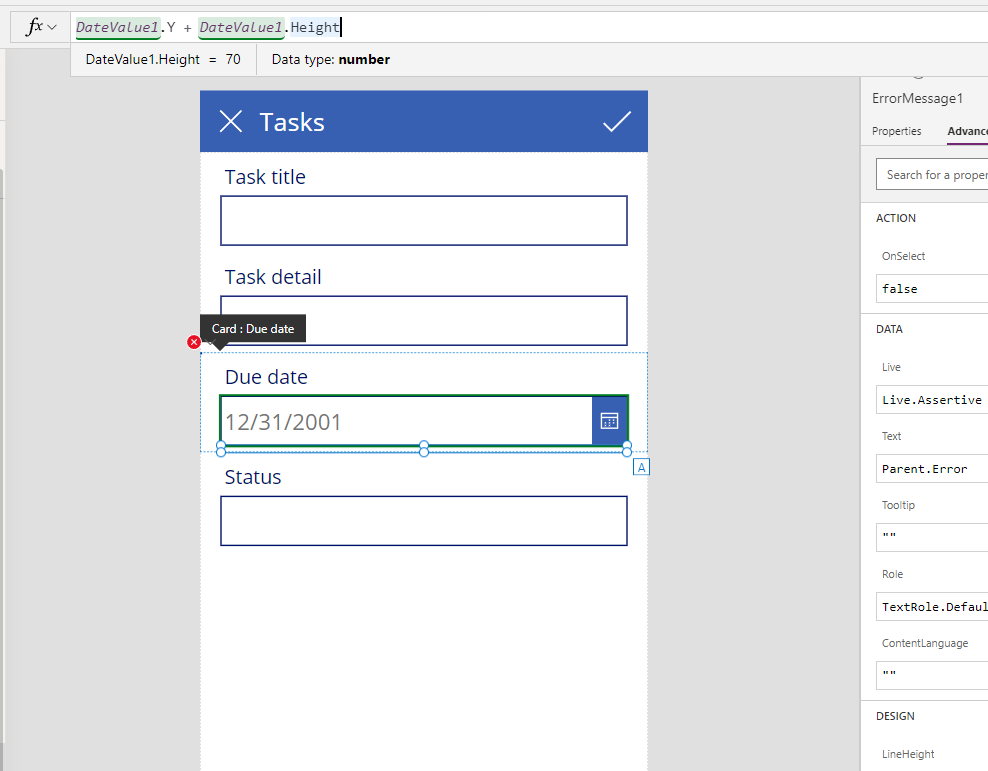
As you can see, there are some error marks at the top left corner of Due date field. Click them and select “Edit in the formula bar”.
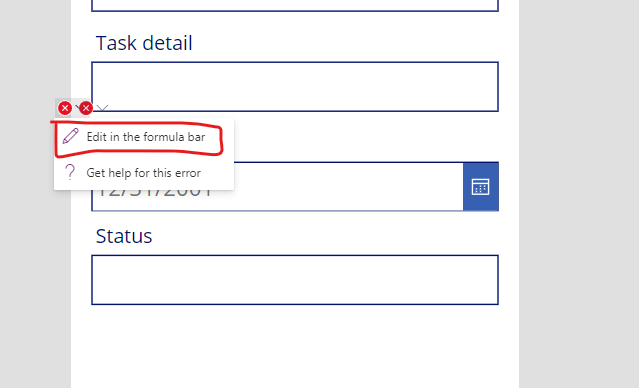
Delete the hour and minute reference parts.
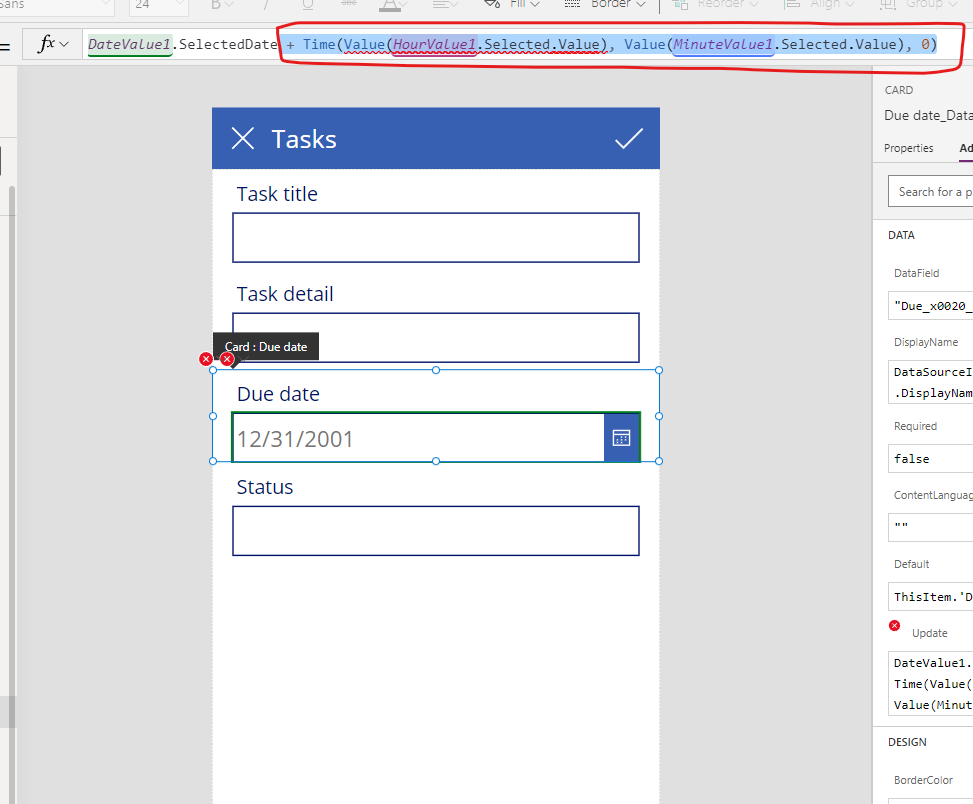
Change HourValue1 to DateValue1.
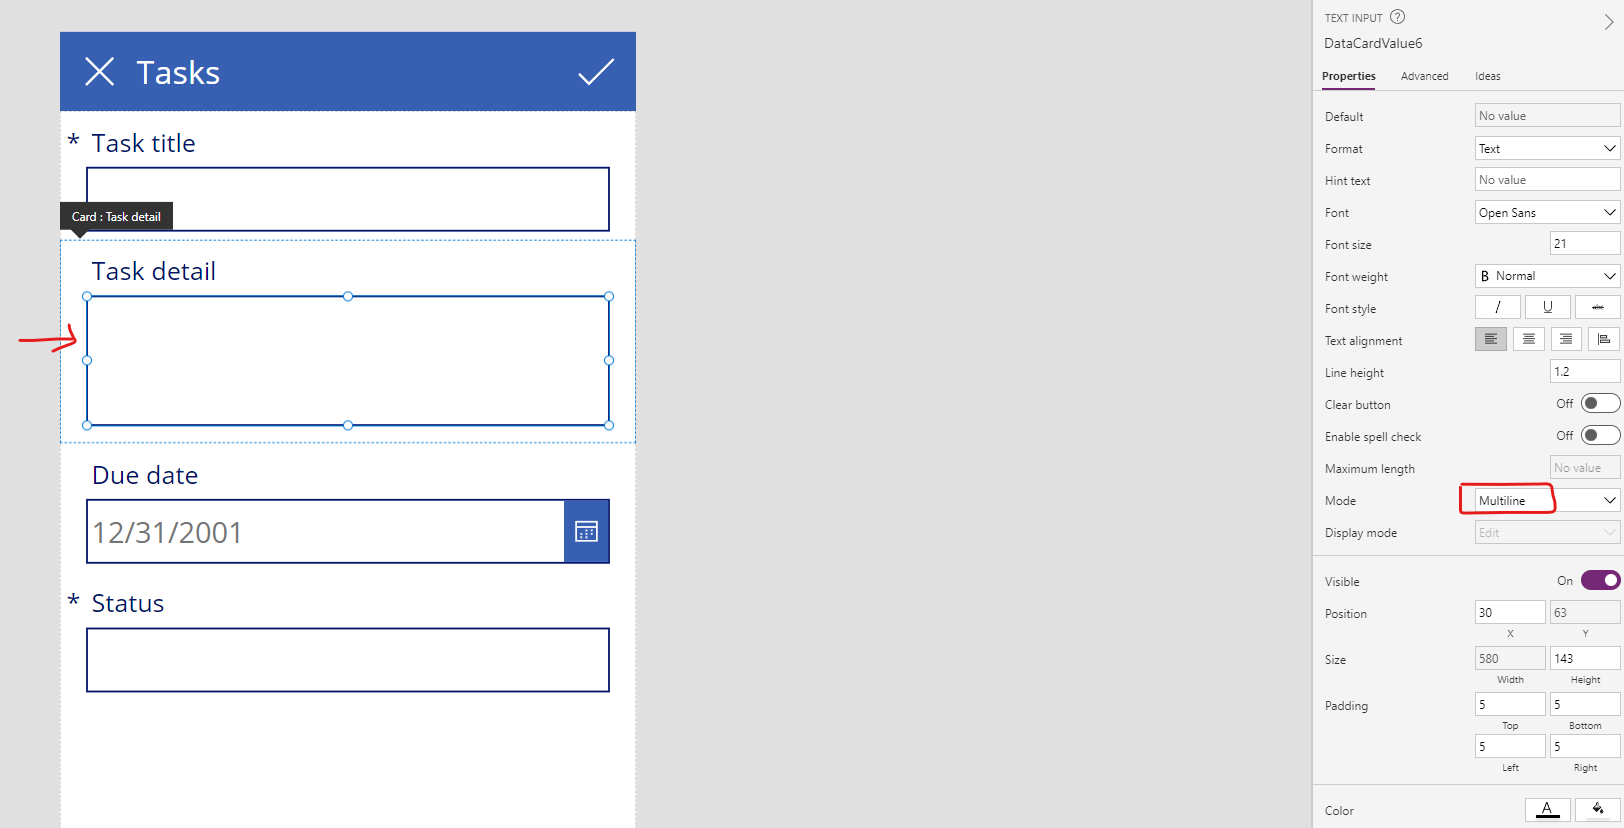
Change the height of Task detail
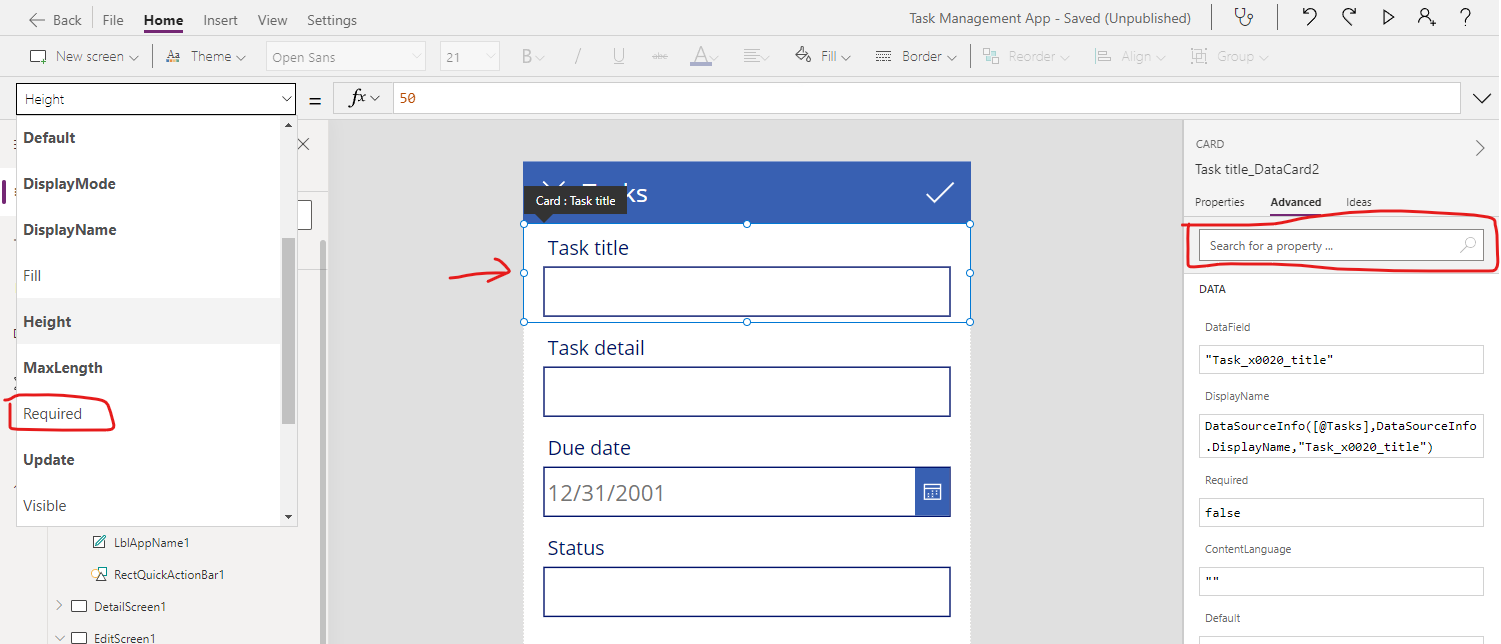
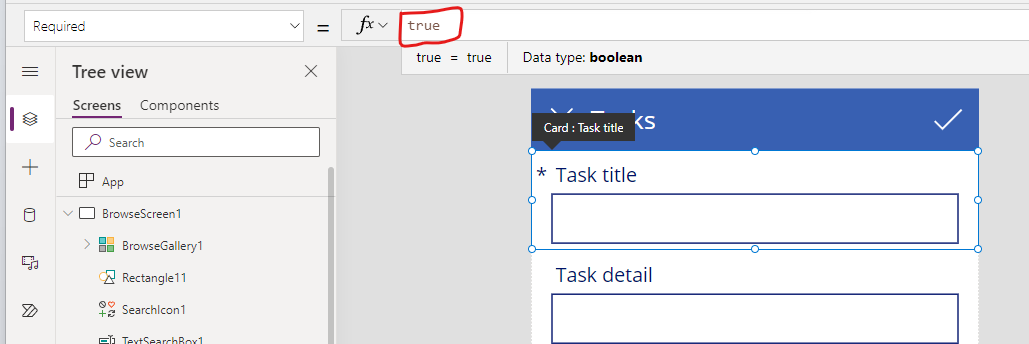
When resolved the errors, let’s set the Required property of Task title and Status.
Click DataCard item, select Required property, set it to true.
Unlock the field if it is locked.
Then let’s increase the height of Task detail because there are more contents in the Task detal and change its Mode from Singleline to Multiline.
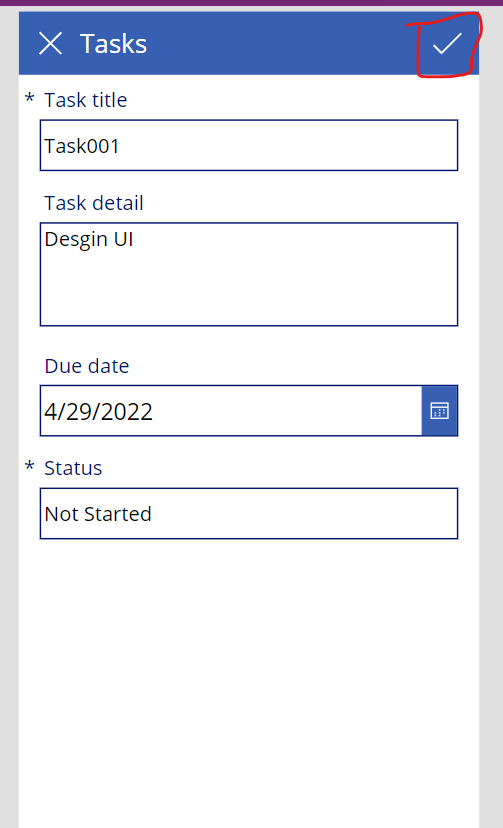
Preview the app and add data
Next, let’s preview the app and add some data using the edit screen.
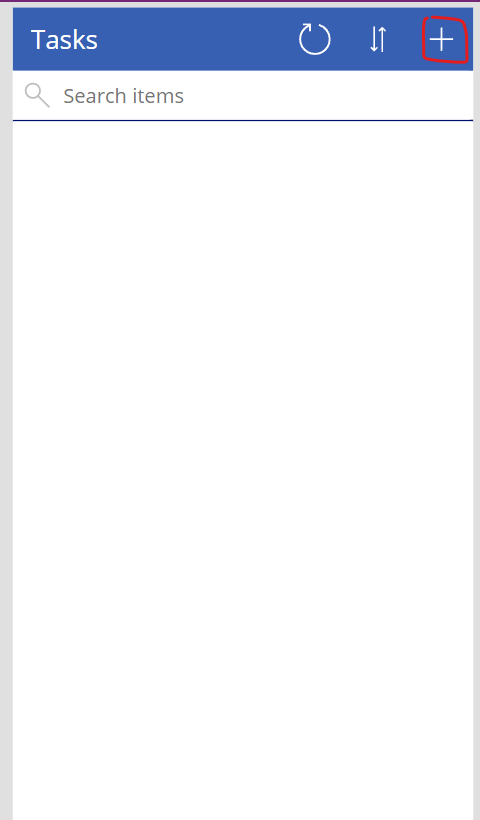
Click the triangle icon at the top right corner to perview the app.
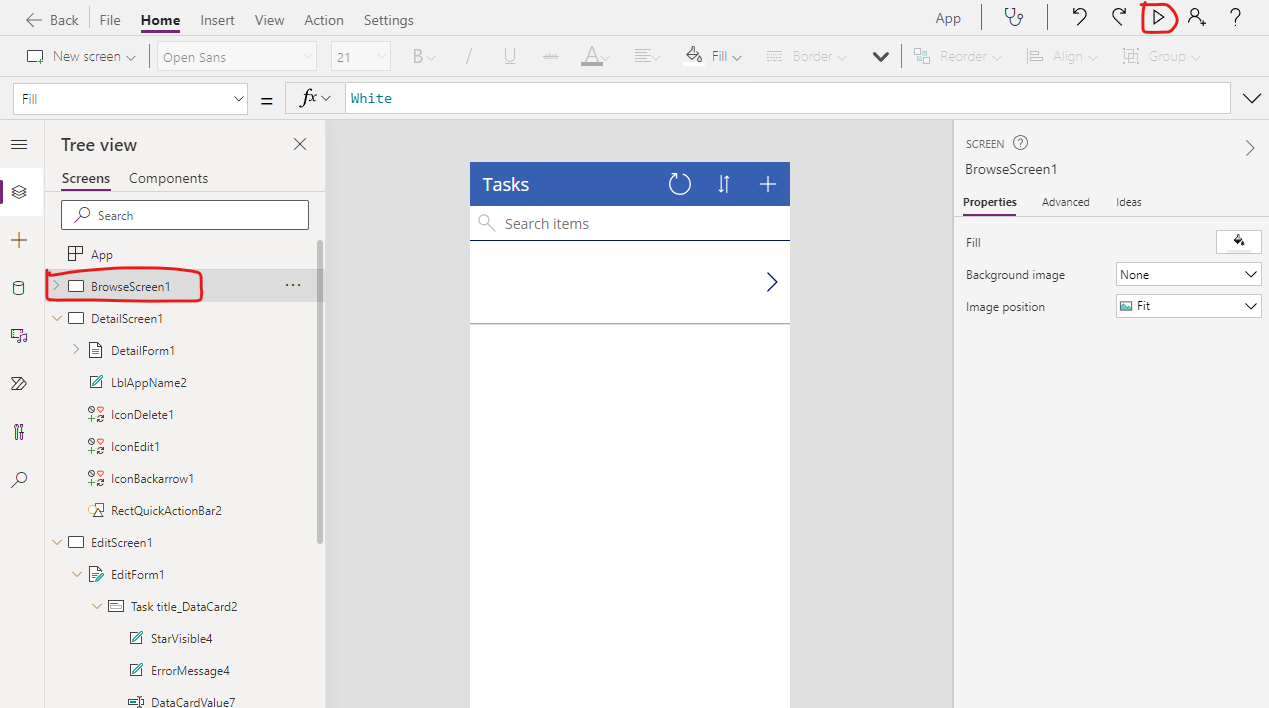
Click the + icon to open the edit screen.
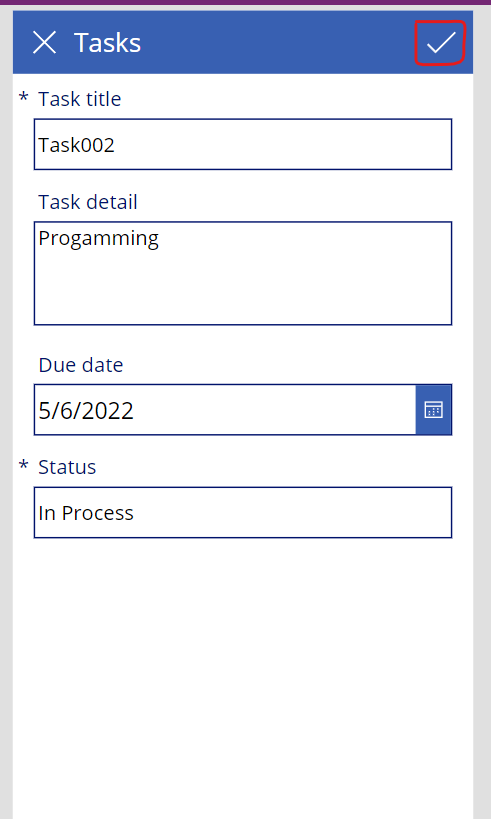
Fill all the fields, and click ✔ icon to save it.
Add the second data.
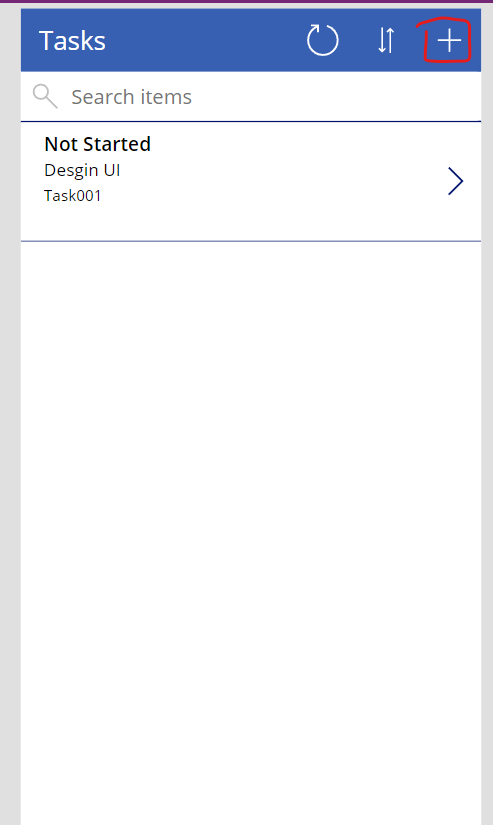
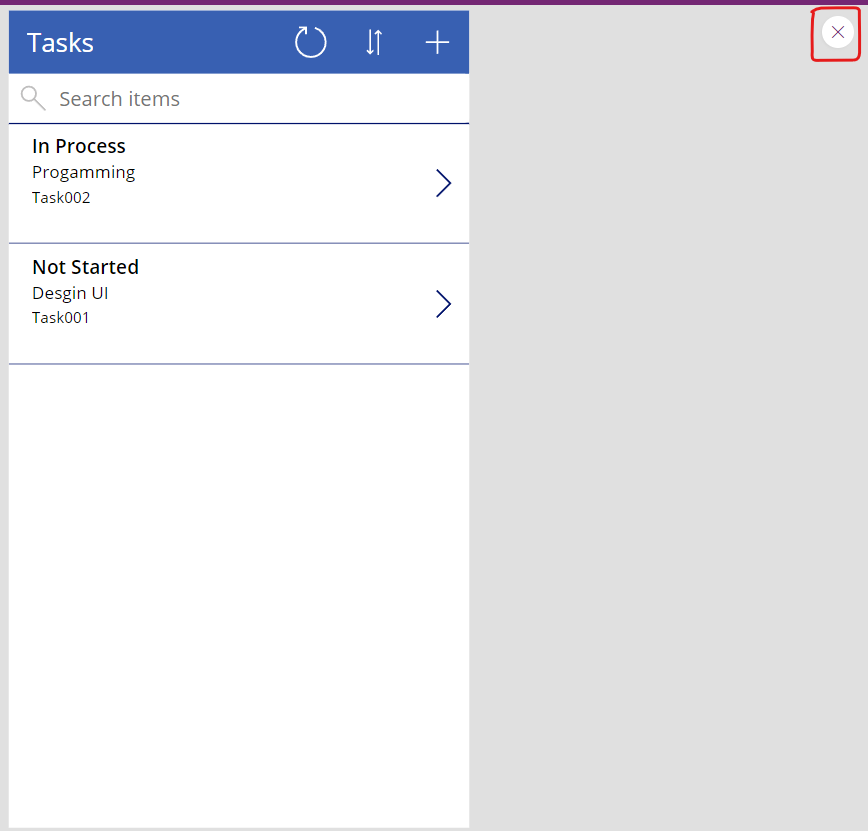
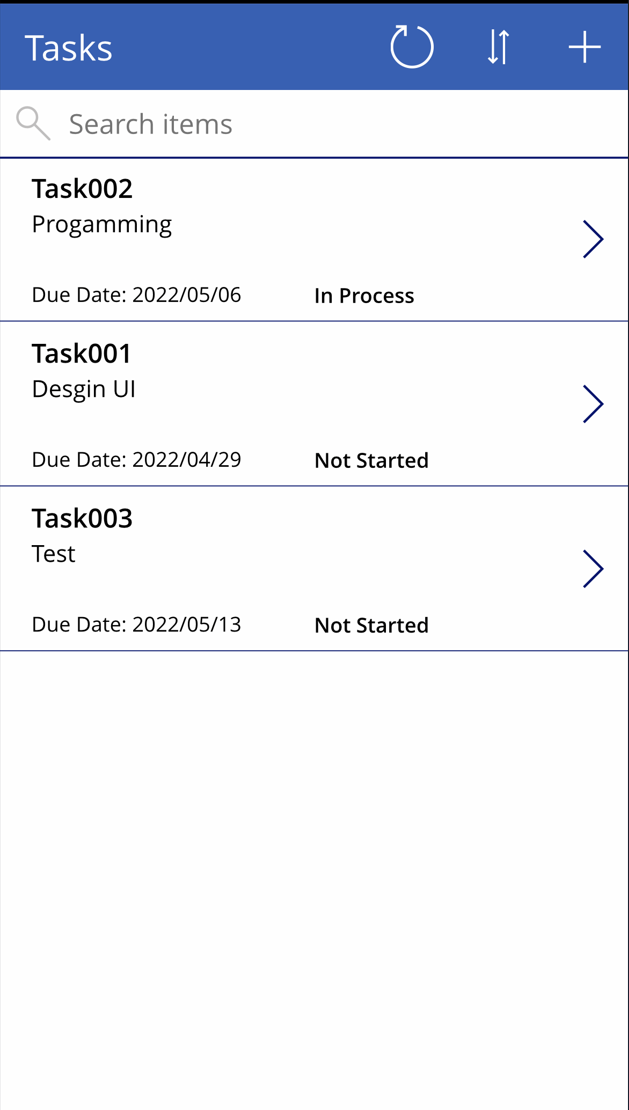
As you can see, the added two records show in the list.
Click × icon to close the preview.
Customize the browse screen
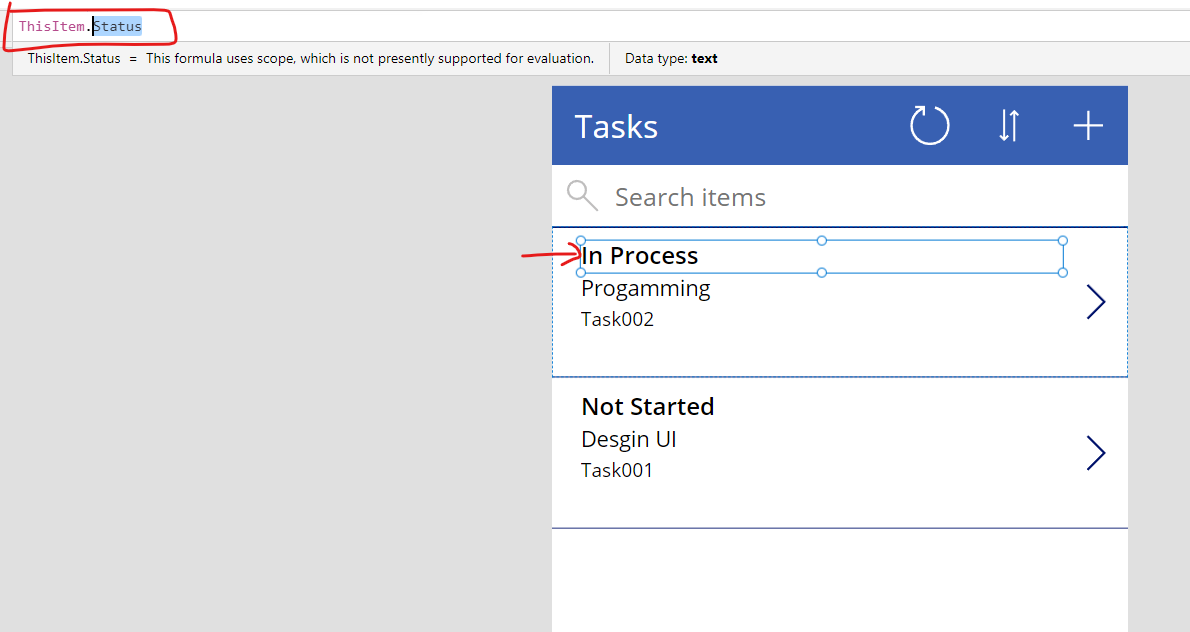
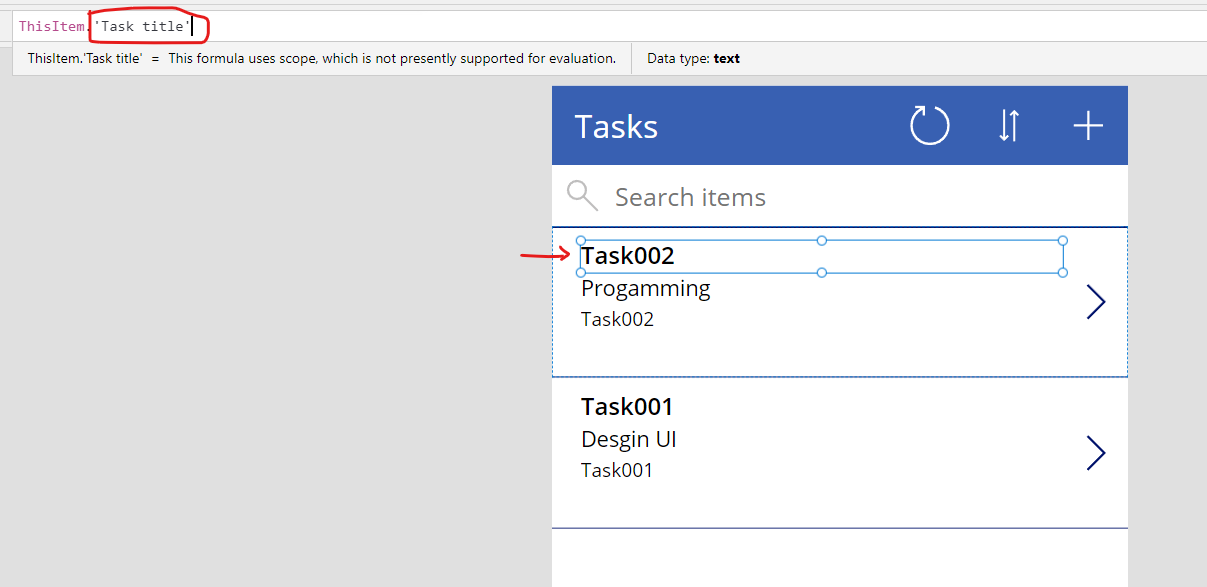
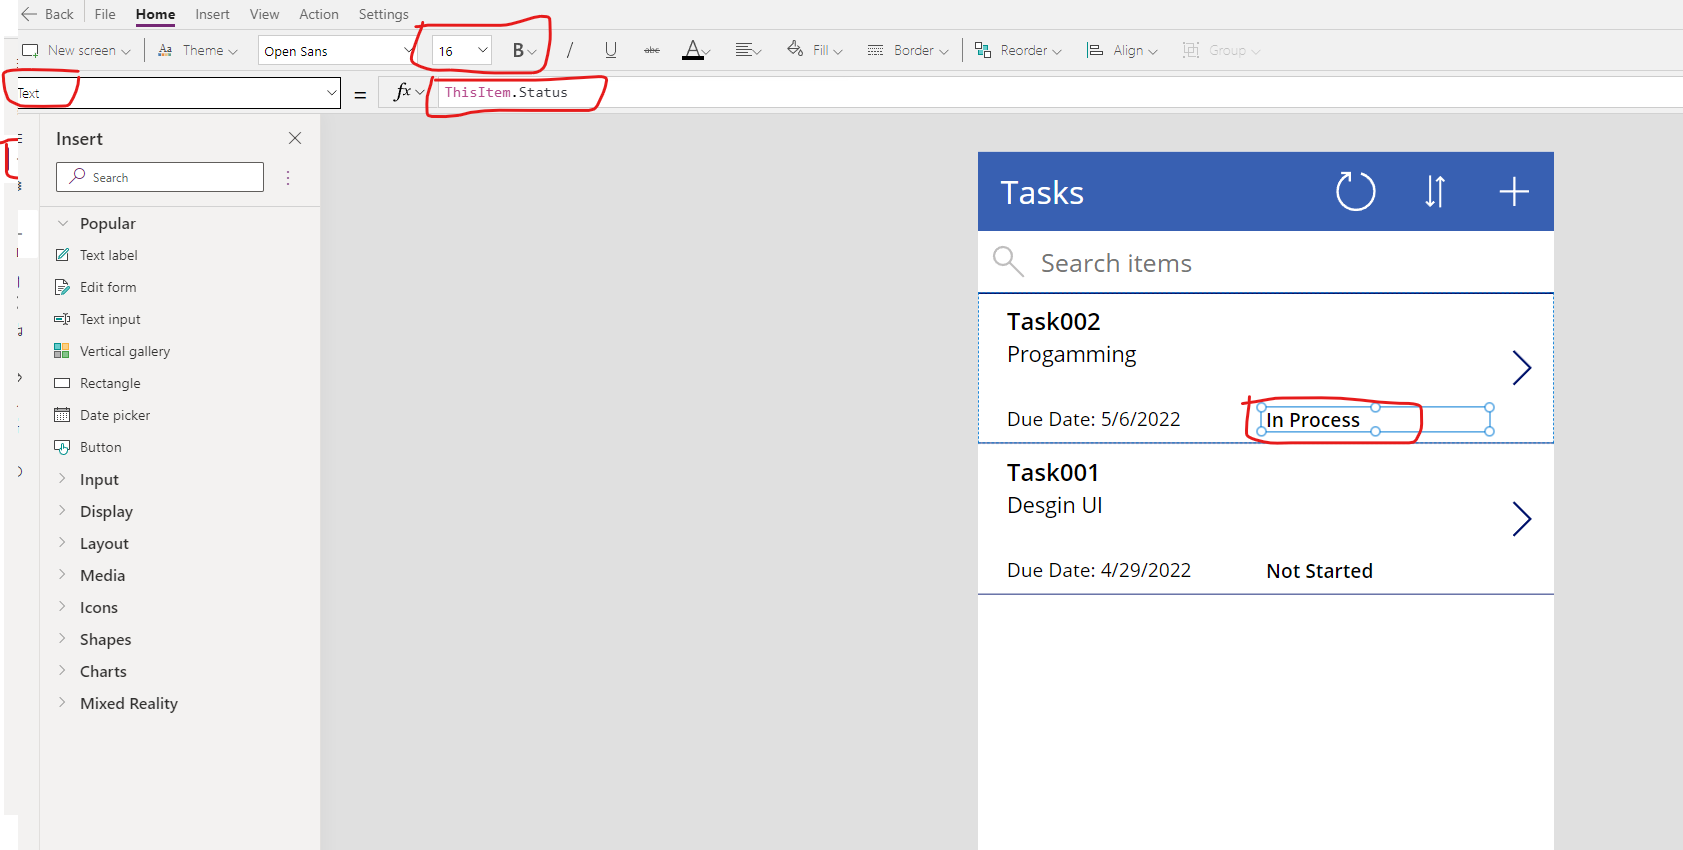
Make Task title item as the top item by modifying the formula from ThisItem.Status to ThisItem.‘Task title’.
Increase the height of the Task detail and move the Due date to the bottom fo the item display area.
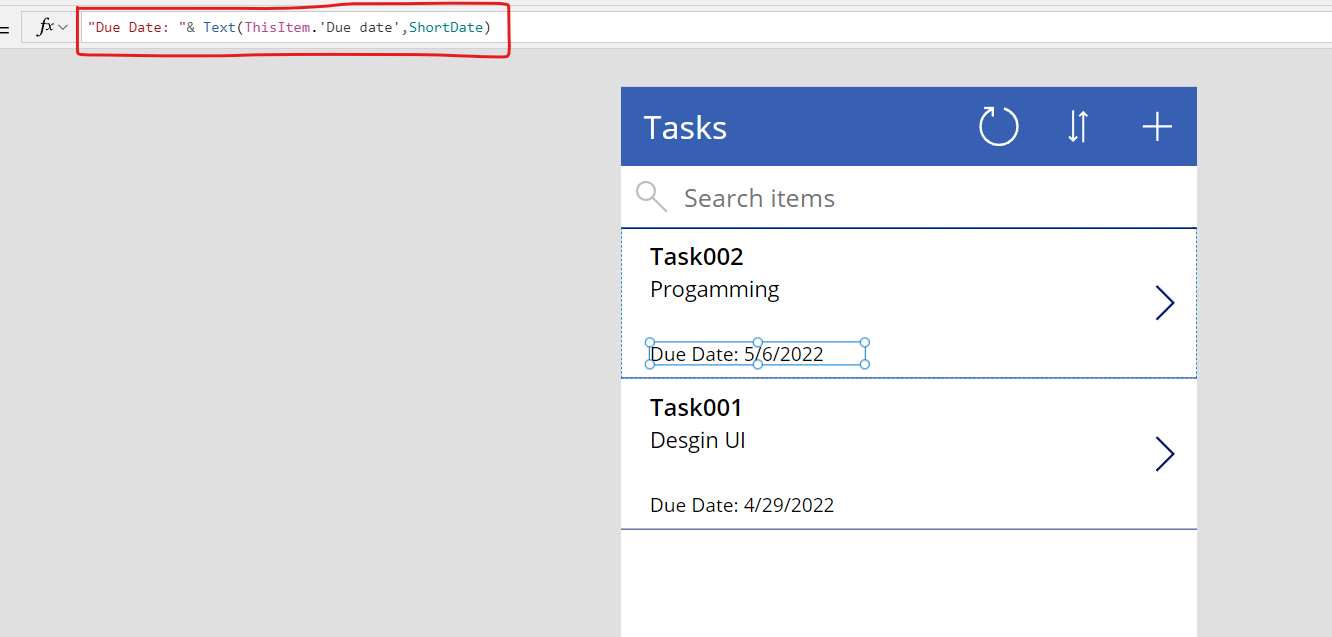
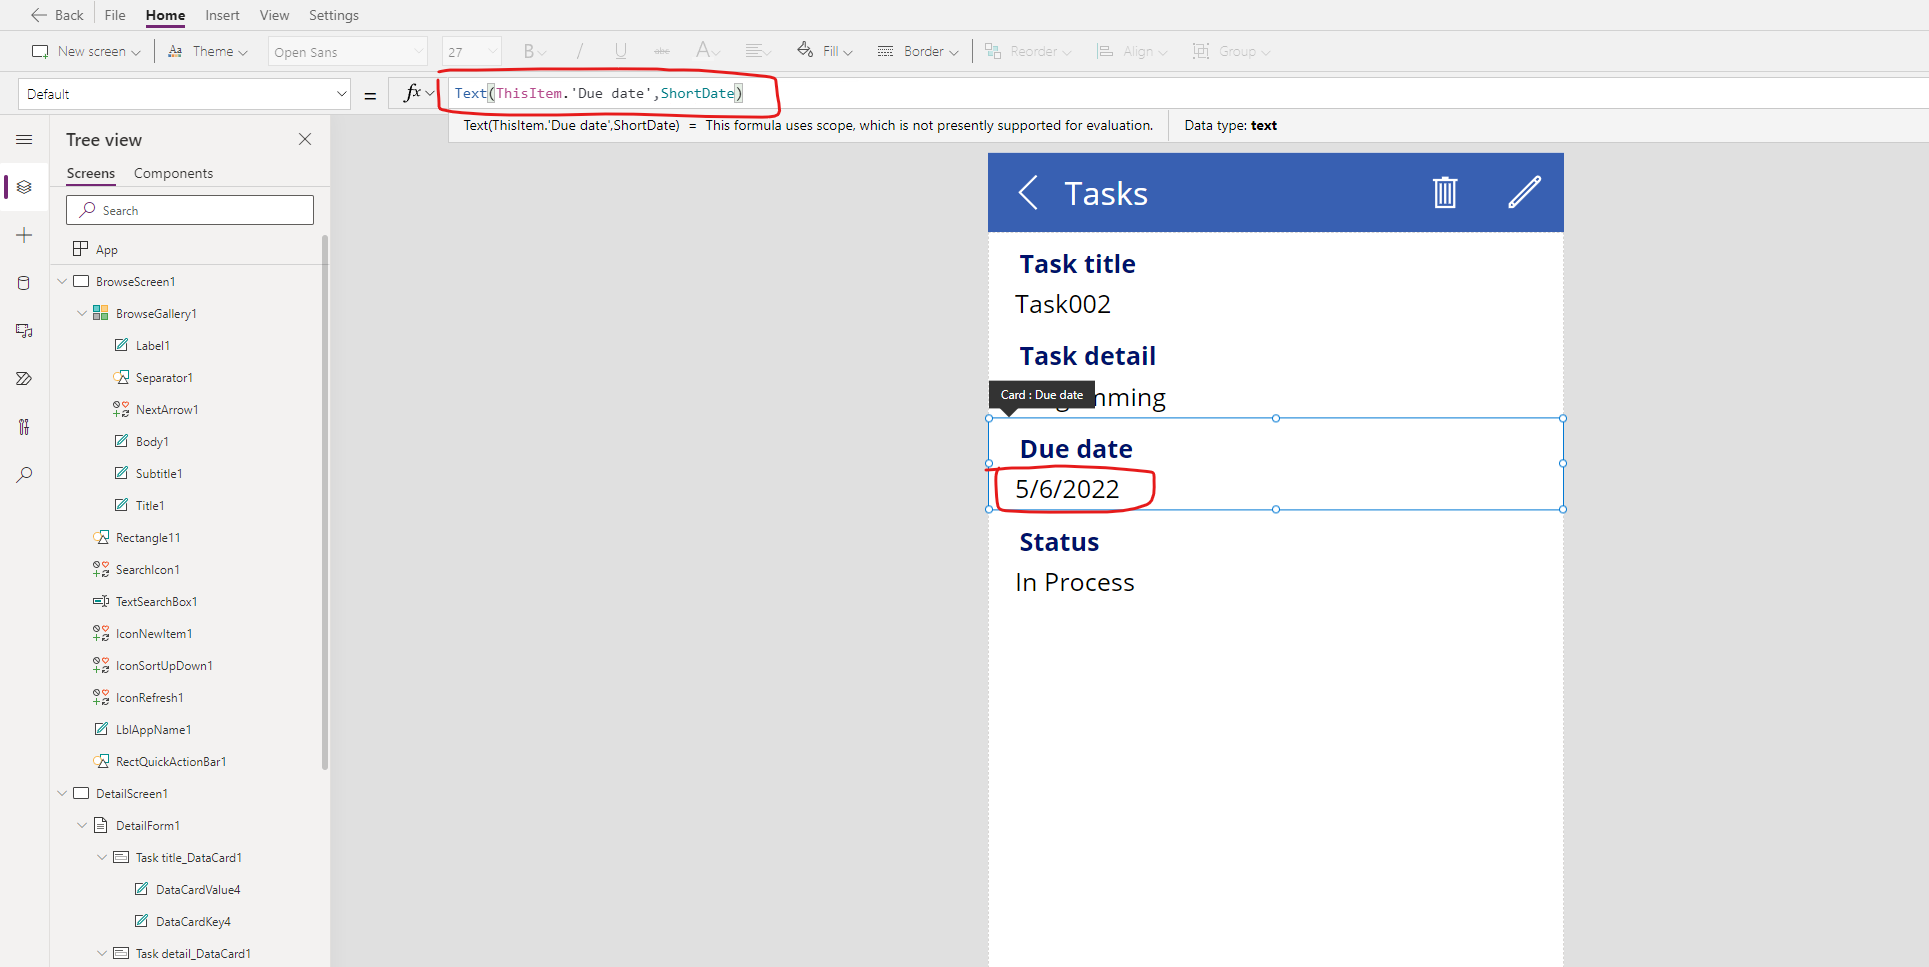
Change the formula of the Due date as follows to add the label and show it in short date format.
"Due date: " & Text(ThisItem.'Due date', ShortDate)
Next, let’s add the Status field again. Click + , select Text label when selecting the single item area.
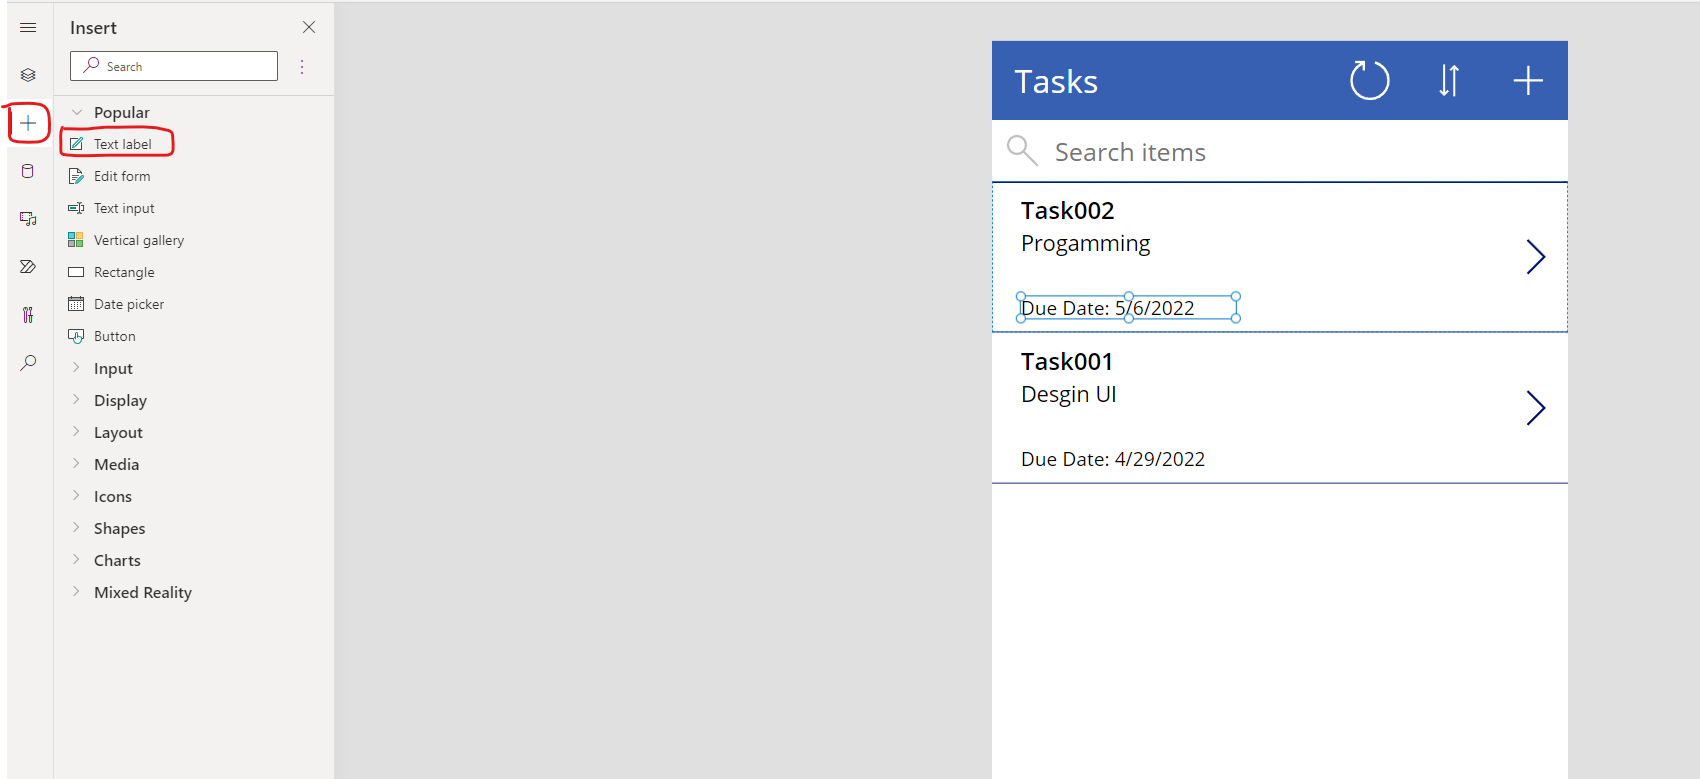
Adjust the position of the Status field, make its font size same as Due date and change the font style to Bold.
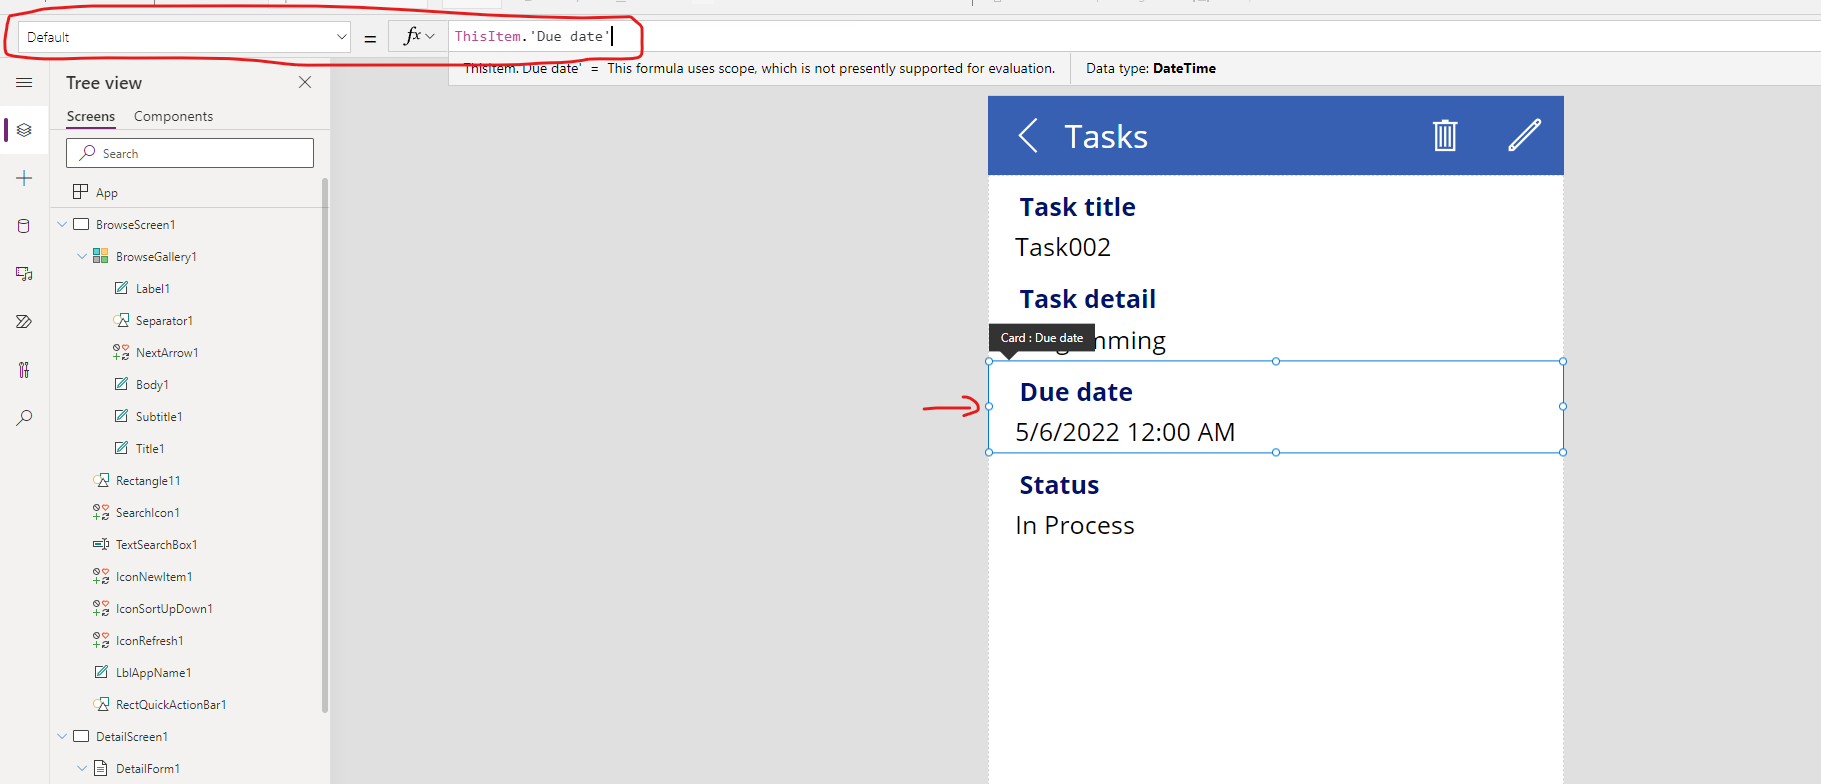
Customize the detail screen
Next, let’s customize the detail screen.
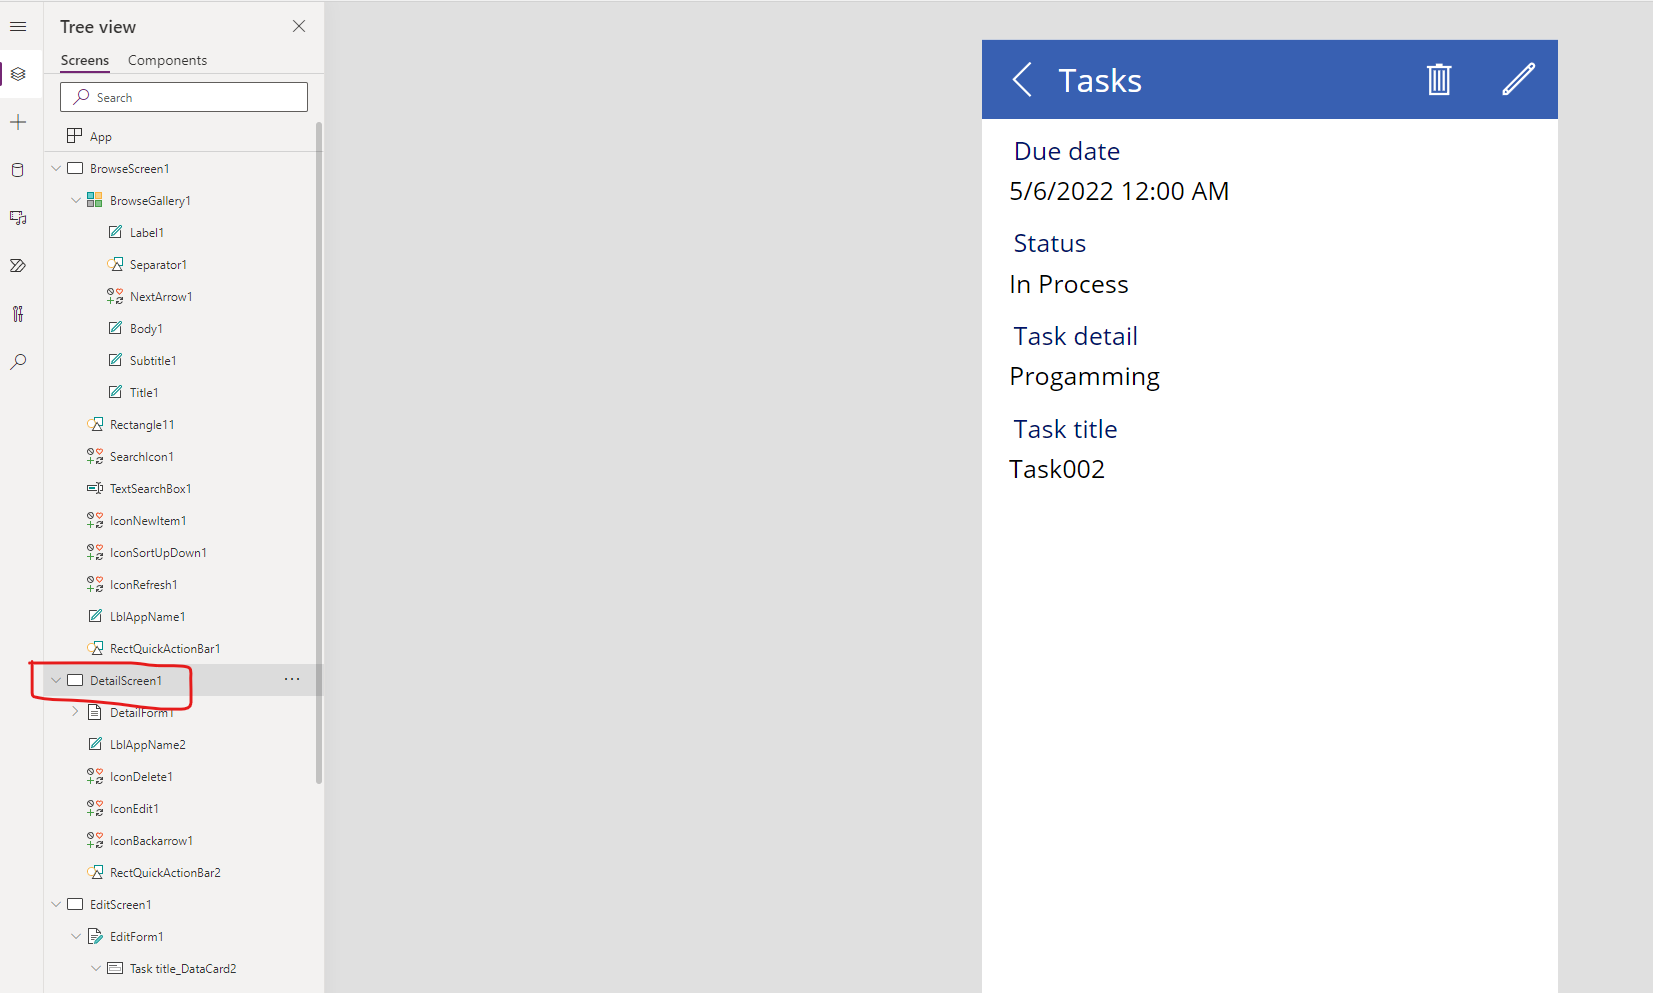
Change the order of the fields.

Change the format of Due date.
Up to here, we have finished a simple task management app.
Share the app and run it on the mobile
To simulate real scenarios and test the app , we can share it to another user(user002).
And he or she open the app in their own mobile.
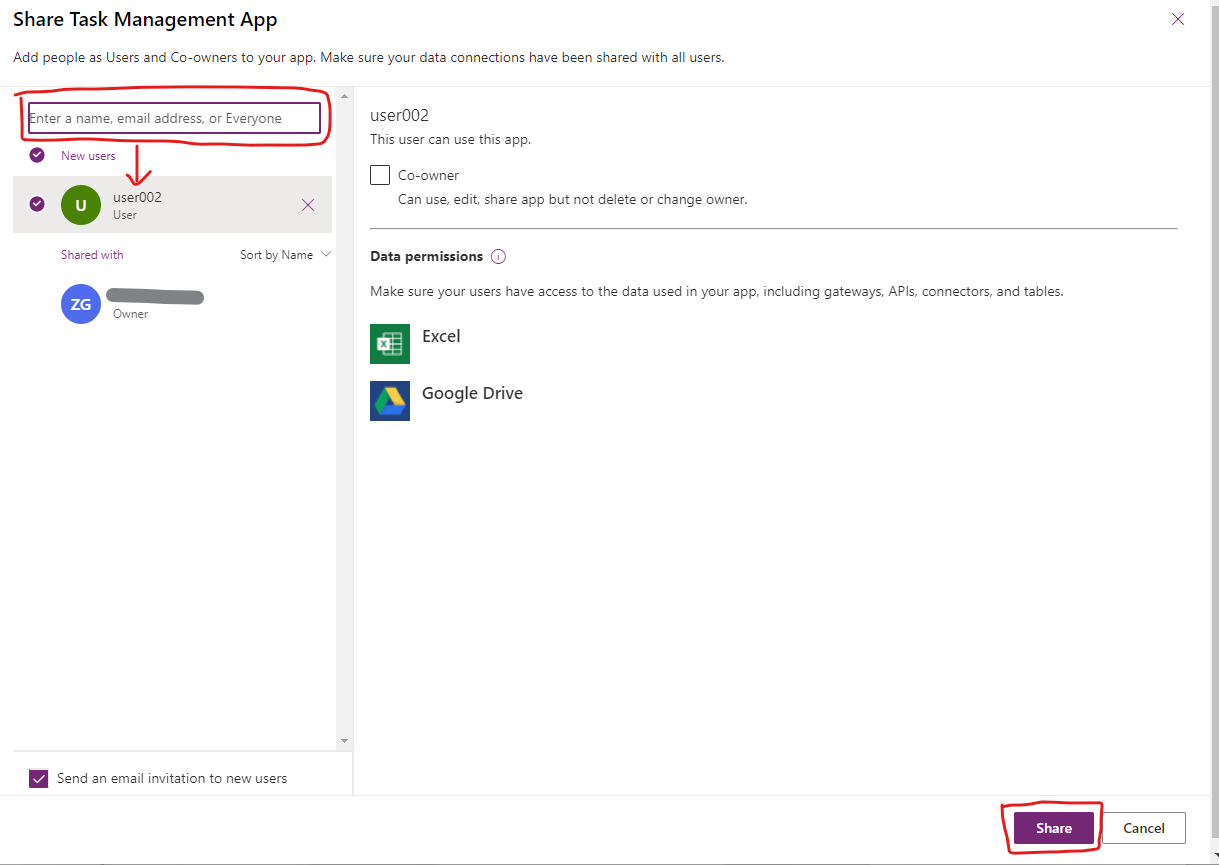
Share the app
Click the person icon at the top right corner to share the app.
Enter the user name(user002) and search it.
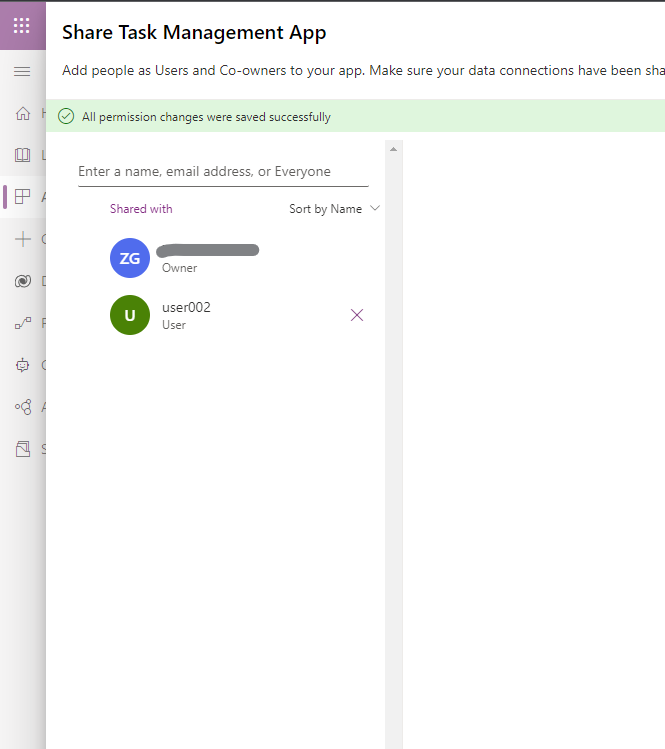
Select the target user and click Share button.
Run the app
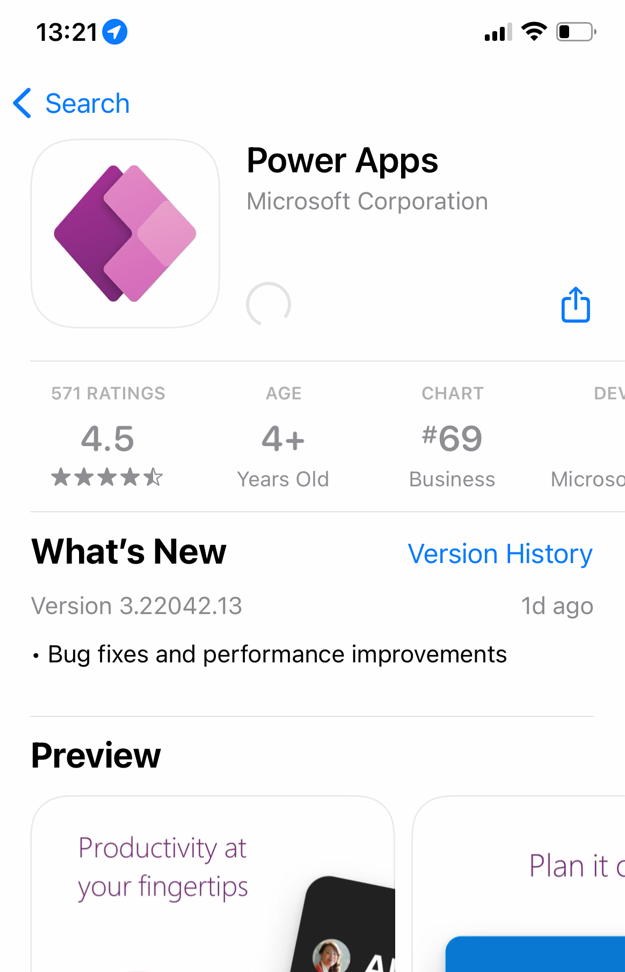
The target user need to download the Power Apps app first on their own mobile.
Here we take the iPhone as an example.
Download the Power Apps app from the App Store.
Open the app, sign into it with user002.
We will find the shared app in the All apps.
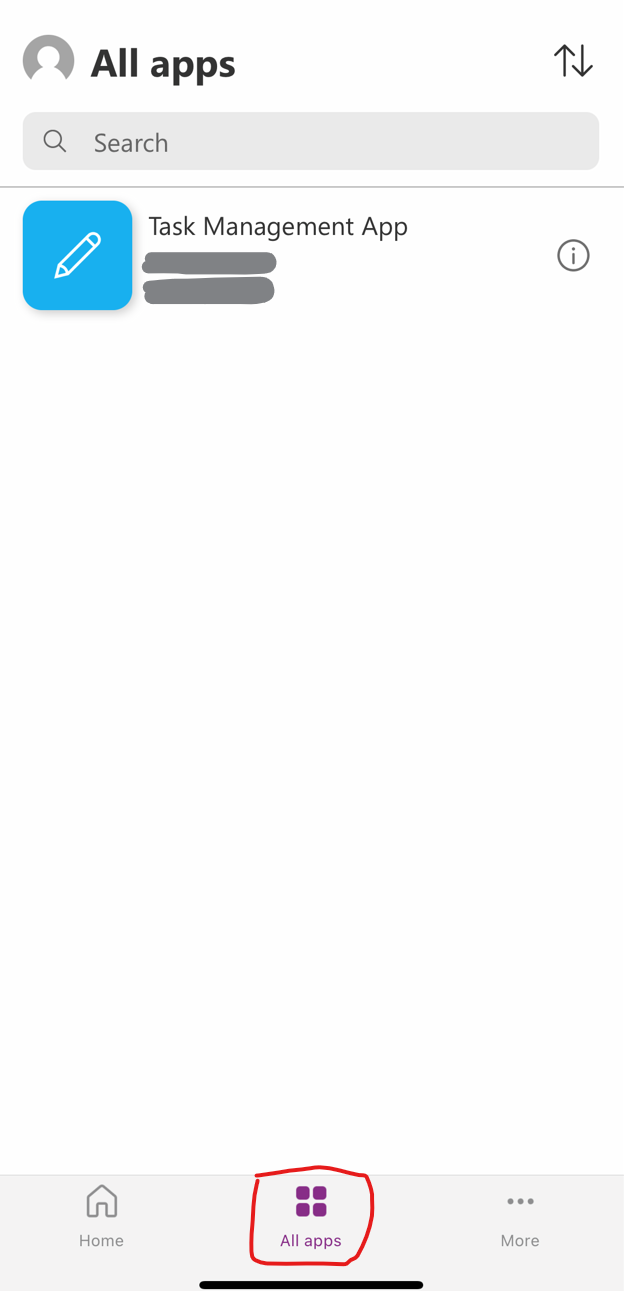
Click it and the browse screen will show.
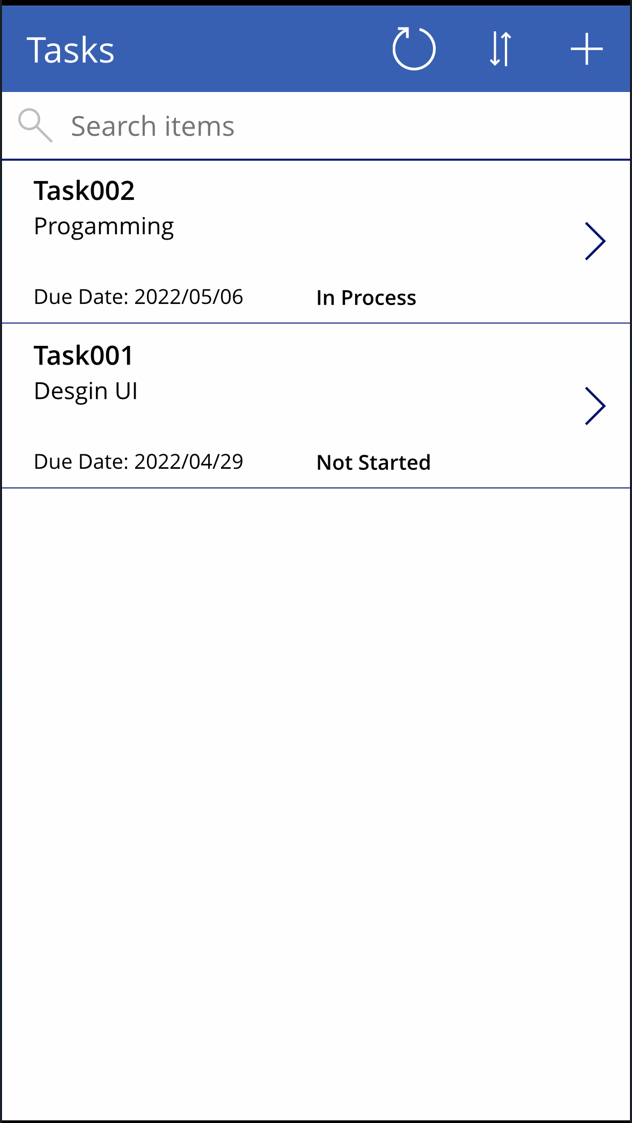
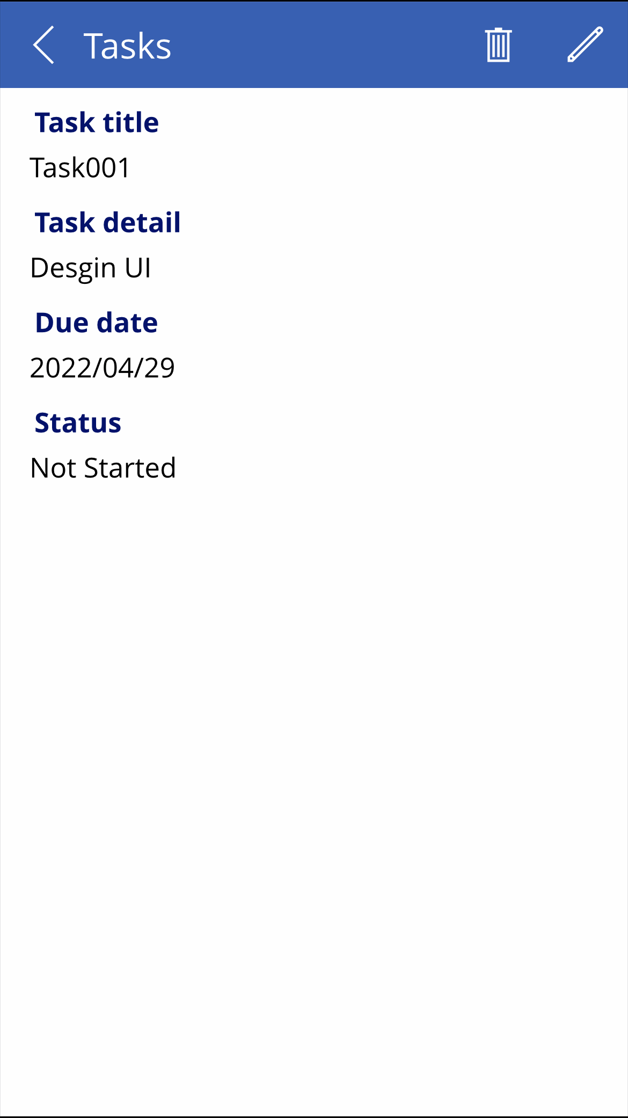
Click Task001 to see its detail.
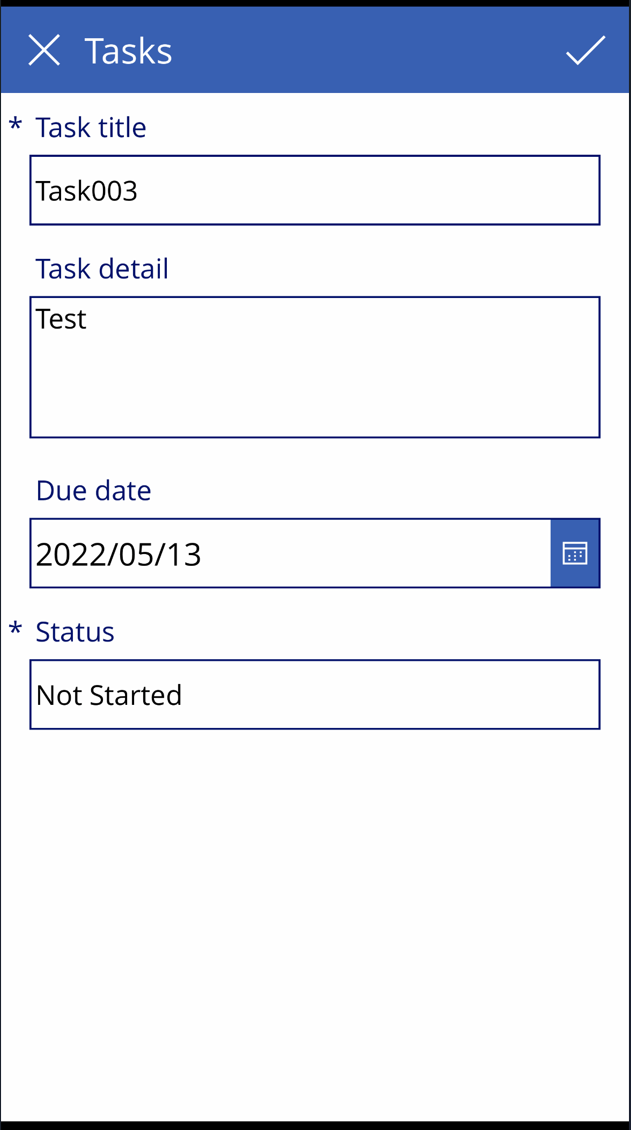
Add a new record using the edit screen.
Let’s check the original Excel and the new data is added.

Conclusion
- We prepared an Excel file and upload it to Google Drive.
- We created a simple app from Excel.
- We customized the app.
- We saved and reopened the app.
- We add the sample data.
- Finally, we shared the app with another user and open the app on the mobile.